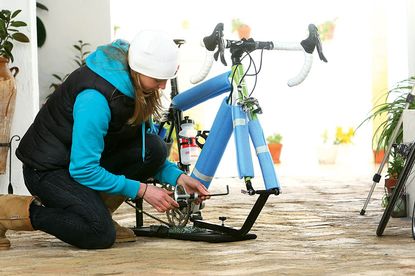
How to build your new bike
For safety reasons it is hugely important that your new bike is set up and built correctly. If you have just received a new bike in a box, then this guide is designed to help

Many bicycles are now brought on the Internet and are delivered in a box. In this guide we will explain the tools you need, how to build your new bike, how to build it and how to check it is safe. If you are not sure about anything we would suggest that you visit your local bike shop. They should be more than happy to check it over for you.
>>> Buyer's guide to road bike helmets
Tools required
- Track pump
- Pedal spanner
- Allen Keys
- Torque wrench (optional, but recommended)
- Can of lubricant & grease
- Workshop stand (optional, but very useful)
- Wire cutters (To cut brake, gear cables and to crimp ends, if you need to set up gears and brakes)
General Points to be aware of
- When assembling carbon fibre parts such as handlebars and seat posts, it is always recommended that you use some carbon assembly paste. A small sachet is usually included in the cardboard box, but if not, your local bike shop will have it.
- When tightening bolts look for the recommended clamping force. This is usually written in tiny writing next to the bolt. Seat posts are usually 6 Nm. This is important. Over-tightening can cause components to fail or stick and under-tightening can cause components to slip. (No one wants their handlebars to spin round when they are going down a steep hill!)
- Threads should be greased. This includes bolts and pedals. Most new bikes have bolts that are pre-greased. This is to stop them seizing.
- A Teflon spray, such as GT85 is ideal for lubricating cables.
- If you are building a childs bike, then they are much more simple and a lot of the points to do with gears and headsets probably won’t be necessary.
1. Remove the packaging
Most bikes will come in lots of packaging, with the handlebars twisted round and the wheels removed. The first job is to remove all the packaging, string, cable ties and polystyrene. The easiest way to do this is to put the bike frame in a workshop stand and cut away all the packaging. If you don’t have a work stand, prop the bike against a wall.
And remember, your bike might be the wrong size, and may need returning. It is therefore wise to carefully take off the packaging and also have a rough idea of how it was packaged. As if it needs to go back you can put it in the box it came in.
2. Put the wheels in
Once the packaging is removed, insert the wheels. Fit quick release skewer to the wheel, first apply a thin layer of grease alone the entire length of the skewer rod (they might be pre greased). Check the rotation of the tyre/wheel (arrow marking on sidewall of tyre rotating forward). The quick release lever should be on the left of the bike as you sit on it.
>>> Buyer's guide to road bike wheels
When installing the front wheel, simply place the axle evenly up into the fork dropouts, with the quick release lever on the left side of your bike. Making sure the wheel is aligned central between the forks. You may need to release the cam on the brake calipers, to make them wider, to allow the wheel to slot in. Cheaper bikes may not have a cam, but deflating the tyre should enable you to get the wheel in.
Get The Leadout Newsletter
The latest race content, interviews, features, reviews and expert buying guides, direct to your inbox!
>>> The anatomy of a road bike wheel
It is not uncommon for the wheels to get slightly bent if it has been mishandled in transit. You should therefore check that they are true. To do this, lift the bike off the ground and spin the wheel. Watch how it tracks against the frame – A wonky wheel should be spotted easily. If your wheel(s) need truing, your local bike shop can assist.
You should also inflate the tyres! A track pump with a gauge is the best tool. Most tyres have writing on the side, telling you the recommended pressure you should go to.
3. Twist the handlebars round
To do this you will probably have to use Allen keys, the size of which will depend on your bike. Bike stems usually have four or two Allen bolts, but on some bikes these are torqx. If you don’t have a torqx key to hand, you can actually use a size down Allen key. If the bolts are not greased, it is recommended to grease them to prevent them ceasing in the future.
>>> How to get your handlebar height right
Loosen the bolts on the stem and twist the handlebars into the desired position. When you tighten the stem bolts make sure you tighten them each incrementally and gradually. If you over tighten one, then the stem can fail. If using a torque wrench, 5-6 Nm on each bolt should be sufficient.
4. Insert the seat post
The seat post may be already in the frame, but clamped in its lowest position, so that the bike could fit in the box. To get your saddle the correct height we recommend you have a look at our saddle height page here.
Video – How to get your saddle height right.
5. Set up brakes and gears
In the interest of safety and enjoyment, we strongly recommend that you check that your brakes and gears are set up correctly and that your headset is sufficiently tight. Fortunately we have made videos that show you how to do just that! The links to these can be found here.
Video - How to set up your brakes
Some bikes can come without the cables inserted. This is fairly simple to do, but you may wish to consult our guides. If you need to cut cables, make sure you use dedicated cable cutters. Don’t bodge the job with scissors, as these will splay the cable end.
Video - How to set up and adjust your gears
Note: cables bed in, and it is normal for there to be a bit of stretch after a couple of weeks. This might result in your gears and brakes becoming a little sloppy after this time. This is normal and just requires you or your local mechanic to tweak them.
>>> How to set up and adjust your gears (video)
6. Check the headset
The headset creates a rotatable interface between the fork and the stem. It is found at the top of the fork. If your handlebars are not straight, then it may need adjusting. For a guide on how to do this you can click here and also watch the video below.
Video - How to adjust your headset
The headset creates a rotatable interface between the fork and the stem. It is found at the top of the fork. If your handlebars are not straight, then it may need adjusting. For a guide on how to do this you can click here and also watch the video.
Most bikes come with the bar tape pre-wrapped, but plenty don't. Wrapping bar tape is not the most straight forward job, so consult your LBS if you're having trouble, but you can find our helpful step-by-step video below.
Now you're good to go!

Thank you for reading 20 articles this month* Join now for unlimited access
Enjoy your first month for just £1 / $1 / €1
*Read 5 free articles per month without a subscription

Join now for unlimited access
Try first month for just £1 / $1 / €1
Oliver Bridgewood - no, Doctor Oliver Bridgewood - is a PhD Chemist who discovered a love of cycling. He enjoys racing time trials, hill climbs, road races and criteriums. During his time at Cycling Weekly, he worked predominantly within the tech team, also utilising his science background to produce insightful fitness articles, before moving to an entirely video-focused role heading up the Cycling Weekly YouTube channel, where his feature-length documentary 'Project 49' was his crowning glory.
-
 7 steps you mustn't forget when preparing your bike for spring
Mechanic to pros and amateurs alike, Glen Whittington shares his tips for the successful de-hibernation of your bike
By Glen Whittington Published
-
 ‘To find out post-accident that I would be in a wheelchair… I felt like my life was over’ - How adaptive bikes give spinal cord injury survivors their lives back
The High Fives Foundation provides athletes with spinal cord injuries with adaptive bikes and bike camps across the country.
By Kristin Jenny Published