






When To Replace... is a feature series in which we explore when one should replace common cycling products like helmets, apparel and various moving parts on your bike. Curious about a particular product? Shoot us an email at anne.rook@futurrnet.com
Tyres have wear indicators, chains can be measured, and clipless pedal cleats show distinct signs of wear. But how about less obvious things like when to replace your helmet or the sealant in your tyres?
The best tubeless tyre sealant serves two main purposes: it ensures an air-tight seal between your tyres and your rims, and fills small punctures on the fly. While sealant can prevent a puncture from ruining your day, it needs a little more care than a traditional inner tube.
Depending on frequency of use, bike storage environment, riding conditions and weather for instance, you’ll need to perform a bit of maintenance on your tyres and wheels to keep them rolling.
The most obvious time you’ll need to replace sealant in a tubeless setup is if you suffer a puncture and the sealant in your tyres spills out while doing its job. Another indicator it's time to check your sealant levels is if your tyres start losing air more quickly between rides.
Cadex Cycling’s Jeff Schneider likened tubeless tyre sealant to chain lube, as both are consumable products, and not set-it-and-forget-it.
“A common misconception is that tubeless systems are set-and-forget,” said Schneider. “In reality, sealant is a consumable maintenance item, much like chain lubricant. Periodic inspection and replenishment are essential to maintaining puncture protection and optimal system performance.”
Why tubeless tyre sealant ages and how to gauge sealant loss
Silca’s Josh Poertner explained why sealant dries and ages, and characterises the minor difficulties with troubleshooting sealant viability.
“Tubeless sealant relies on solid latex liquified by a high pH solvent. Once in the tyre, some of the solvent evaporates into the tyre air allowing the entire system to maintain a good pH level for that sealant to remain liquid.
“This solvent gas slowly escapes the tyre with the air in the tyre. When you add more air more solvent has to leave the sealant itself to allow the new air to reach equilibrium and the cycle repeats.
“As it loses solvent to evaporation, [the sealant] will thicken to something more like honey before eventually becoming hard.
“You are aging your sealant far faster if you are adding air every two days than if you are having to add it every two weeks,” said Poertner.

The consistency of the sealant will change over time
There are several methods for checking tyre selant levels, as outlined by Poertner:
- Hold the wheel to your ear and shake it; the sealant in there should sound like water sloshing around.
- Use a dipstick (which requires complete tyre deflation and dragging sealant through the valve stem).
- Weigh the wheel/tyre system to see how much of the sealant liquids have been lost. Most sealants are on the order of 70-80% liquid solvent by weight, so if you add 50 grams of sealant to a tyre, your sealant will be completely dried out when you've lost 35-40g.
Poertner indicated he uses the first method. Whilst using enough sealant that you can hear it sloshing may represent a weight penalty, he's not overly concerned, believing the trade off to be worth it.
“I use the shake method every week or two and then add sealant every 60 days or so even if it still sounds good. Better safe than sorry! Another 15 to 20g of sealant doesn't bother me,” Poertner told us.
Schneider recommends checking sealant every two to four months, depending on the environment.
Factors affecting sealant lifespan
“Riders in hot, dry climates may find that sealant dries out more quickly, while cooler and more humid environments can extend service intervals,” Schneider advised.
Schneider, like Poertner, suggests using the shake method, among others, for determining if your sealant needs replenishment.
“Riders training or racing regularly, particularly those participating in long events where puncture protection is critical, checking sealant before major events is a good practice regardless of the service interval.”
Another sealant aging consideration Schneider cautions is the use of CO₂ cartridges.
“CO₂ gas can accelerate the coagulation and drying of some latex-based sealants, potentially reducing their effectiveness and shortening their service life.
“Riders using high-pressure road tubeless systems, where sealant volume is relatively small compared to gravel or mountain bike tyres, the effects of CO₂ on sealant condition can be more noticeable, making post-ride inspection particularly worthwhile.
“If a rider uses a CO₂ cartridge during a ride to repair and re-inflate a tubeless tyre, it is a good idea to inspect the sealant and, if necessary, refresh it once they return home. This is especially important if multiple CO₂ cartridges have been used or if the sealant was already several months old,” said Schneider.
We asked the cycling maintenance authority Park Tools for its advice about signs and indications for when to replace road tyre sealant.
“This is not a cut and dry answer and depends on climate, amount of riding, tyre choice, and type of sealant being used,” says Park’s Truman Purdy.
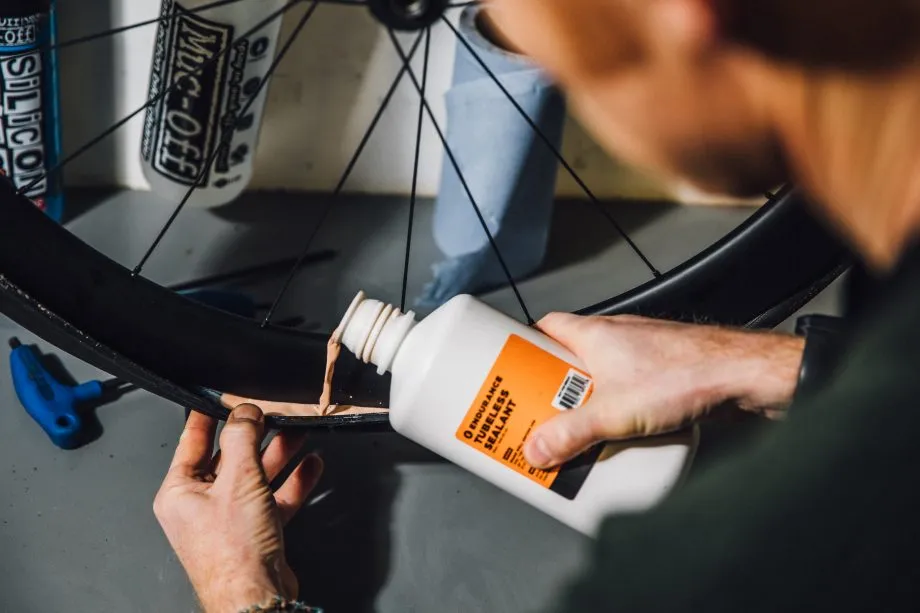
The type of sealant you use will impact how often it needs replacing, among other factors
“My universal suggestion is that you should replace your sealant at the beginning of your riding season, check and refresh about half way through the season and (for best results) drain [and replace at] the end of the season,” Purdy added.
While this seems like a lot to do, in the larger scheme of cycling maintenance, the time spent proactively maintaining your tyre and wheel systems is well worth the investment to keep you rolling.
Purdy cautioned cyclists who use tubeless systems in hotter and drier regions to do a little more proactive maintenance.
“The goal is to be sure that you have enough liquid sealant in the tyre to prevent small leaks and to fill larger holes as they come up. A person who rides a lot in hotter and dryer climates should be checking sealant monthly,” Purdy said.
How to remove old sealant
Silca makes a sealant removing agent, useful for getting sealant off bikes, kit, floors, shoes, and other surfaces sealant may have leaked or sprayed onto while doing its job. But you don’t want to use sealant remover on the inside of your tyres when refreshing sealant. This would compromise the newly installed sealant.
The safest and most effective way to remove old, dried sealant from tyres is with a crepe rubber block (often sold as a sanding belt cleaner) or a heavy-duty natural rubber eraser. Some elbow grease is also useful—use your thumbs to push and roll out clumped sealant.
If the sealant is tricky, you can submerge your tyres and rims in hot—but not boiling—water to soften it up a bit before going to work on it. While some mechanics suggest using a small, plastic scraper, we think the risk of destroying tyres or marring wheels is great enough to avoid using tools.
Stay away from acetone or other cleaning agents which can compromise new sealant, the materials comprising your tyres, and even your rims.