Riding high: testing endurance and equipment in Colorado's San Juan Mountains
A story about searching for oxygen and making peace with hike-a-biking at 13,000 feet

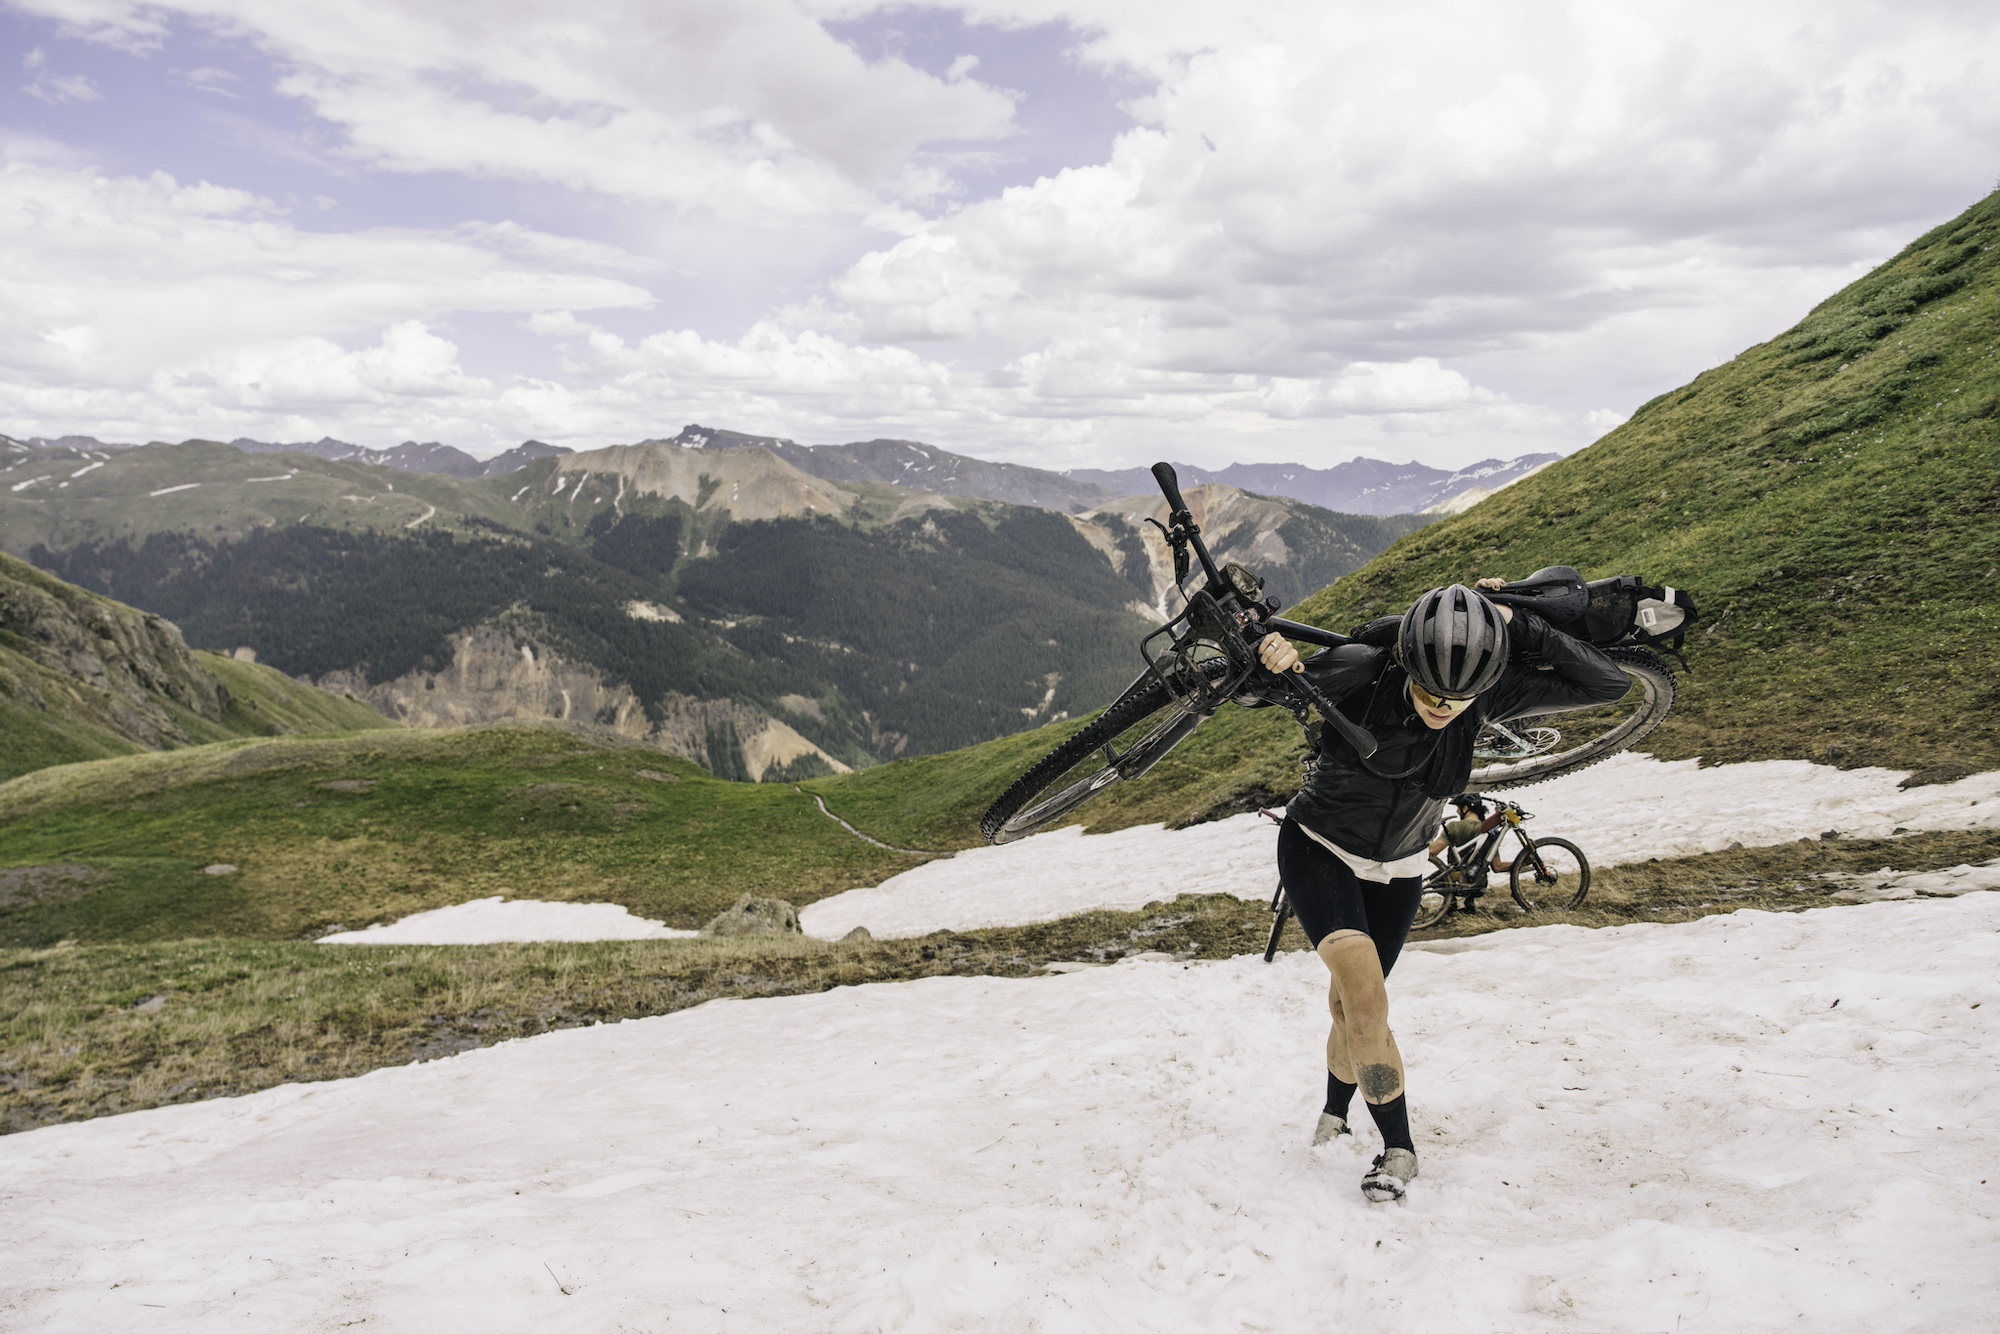
Nestled in the heart of the Rocky Mountains, just north of Durango, Colorado, lies the San Juan Mountains, a breathtaking playground for outdoor enthusiasts. Forged by volcanic activity and shaped by majestic glaciers, the San Juans are a labyrinth of snow-capped peaks, pristine alpine lakes, winding rivers and trails, and wildflower-strewn meadows.
Tucked away in the heart of this high alpine valley sits Opus Hut, a rustic mountain cabin that serves as a welcoming refuge for weary bikers, hikers and skiers. The hut sits at nearly 12,000 feet, and getting there requires tackling the rocky surface and grinding ascent up Ophir Pass road.
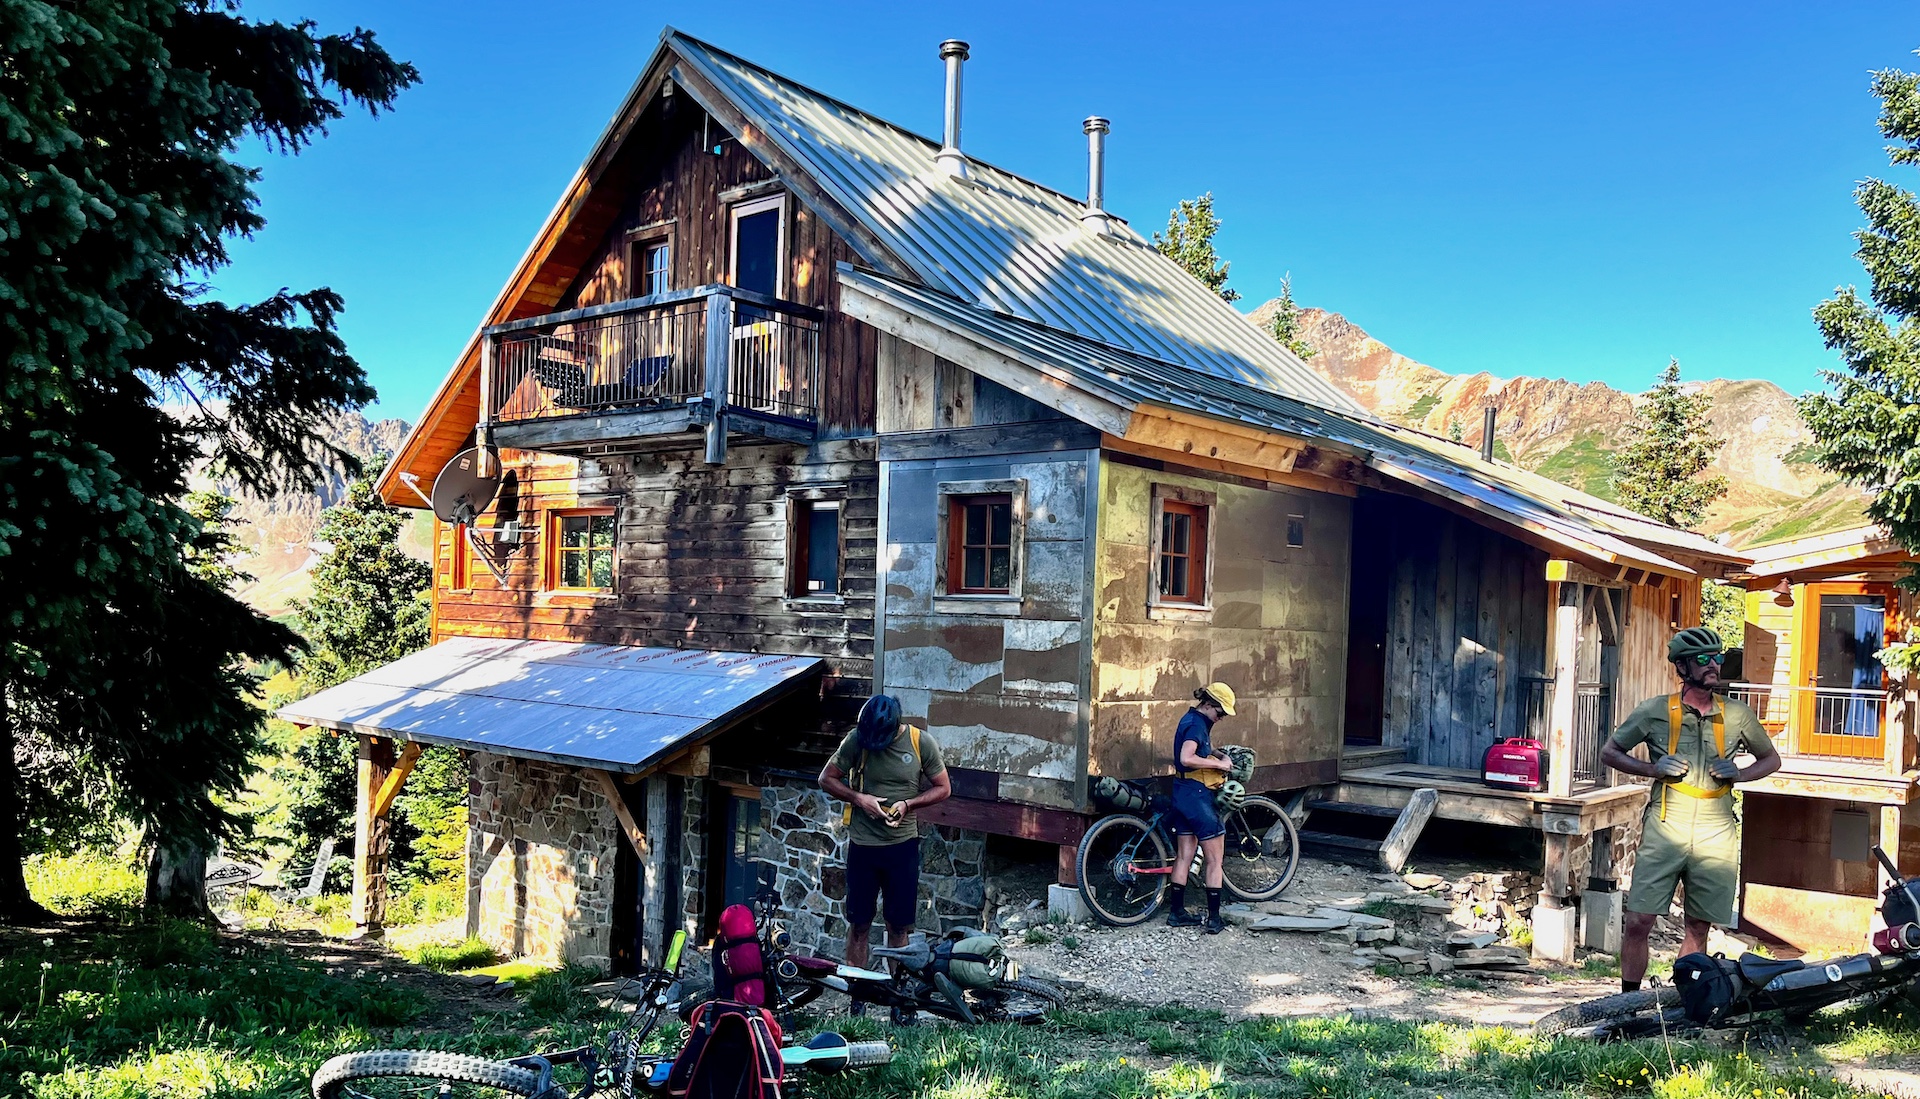
Opus Hut
Opus Hut and the 'nearby' Columbine Lake were the destinations for a 3.5-day, self-supported bikepacking trip with Fjällräven this summer. The Swedish brand was dropping its latest bike collection in collaboration with Specialized, and was using this bike trip as the ultimate field test.
The route was devised by bikepacker extraordinaire Sarah Swallow, and came with enticing descriptors such as "fun sufferfest" and "hard miles."
When details followed closer to our rollout from Durango, it read something like this:
- "Approximately half of the ride exists at altitudes over 10,000 ft. We will be camping at 11,100ft and 11,700ft altitude for two nights, with a first night camp at 7,500 ft to acclimate."
"This route has more climbing than descending."
The latest race content, interviews, features, reviews and expert buying guides, direct to your inbox!
"Ophir Pass is pretty much a 1.5-2 hour hike-a-bike."
"There will likely be monsoons at this time of year, so we need to be under the tree line between 12 p.m. and 2 p.m. Monsoons include lightning, thunder, rain, and potential hail."
"The forecast is showing highs of 97-94 in Durango."
"Even with the heat, there are still a lot of large snow patches in the high country."
"And maybe consider a head mosquito net?"
This was usually paired with more encouraging words such as "well worth the effort," "coolest place," and "a beautiful transition from city to the mountains."
As someone from below sea level (The Netherlands) and currently living at sea level, the altitude alone was enough to unleash some nervous butterflies in my stomach. Add in heat, snow, monsoons, mosquitos and a boatload of climbing, and this all felt like Unbound XL- or Yomp Rally-level fun all over again – but this time, without oxygen.
Heat, snow and mosquitoes vs. Sweeping vistas, alpine lakes and iron-rich mountains
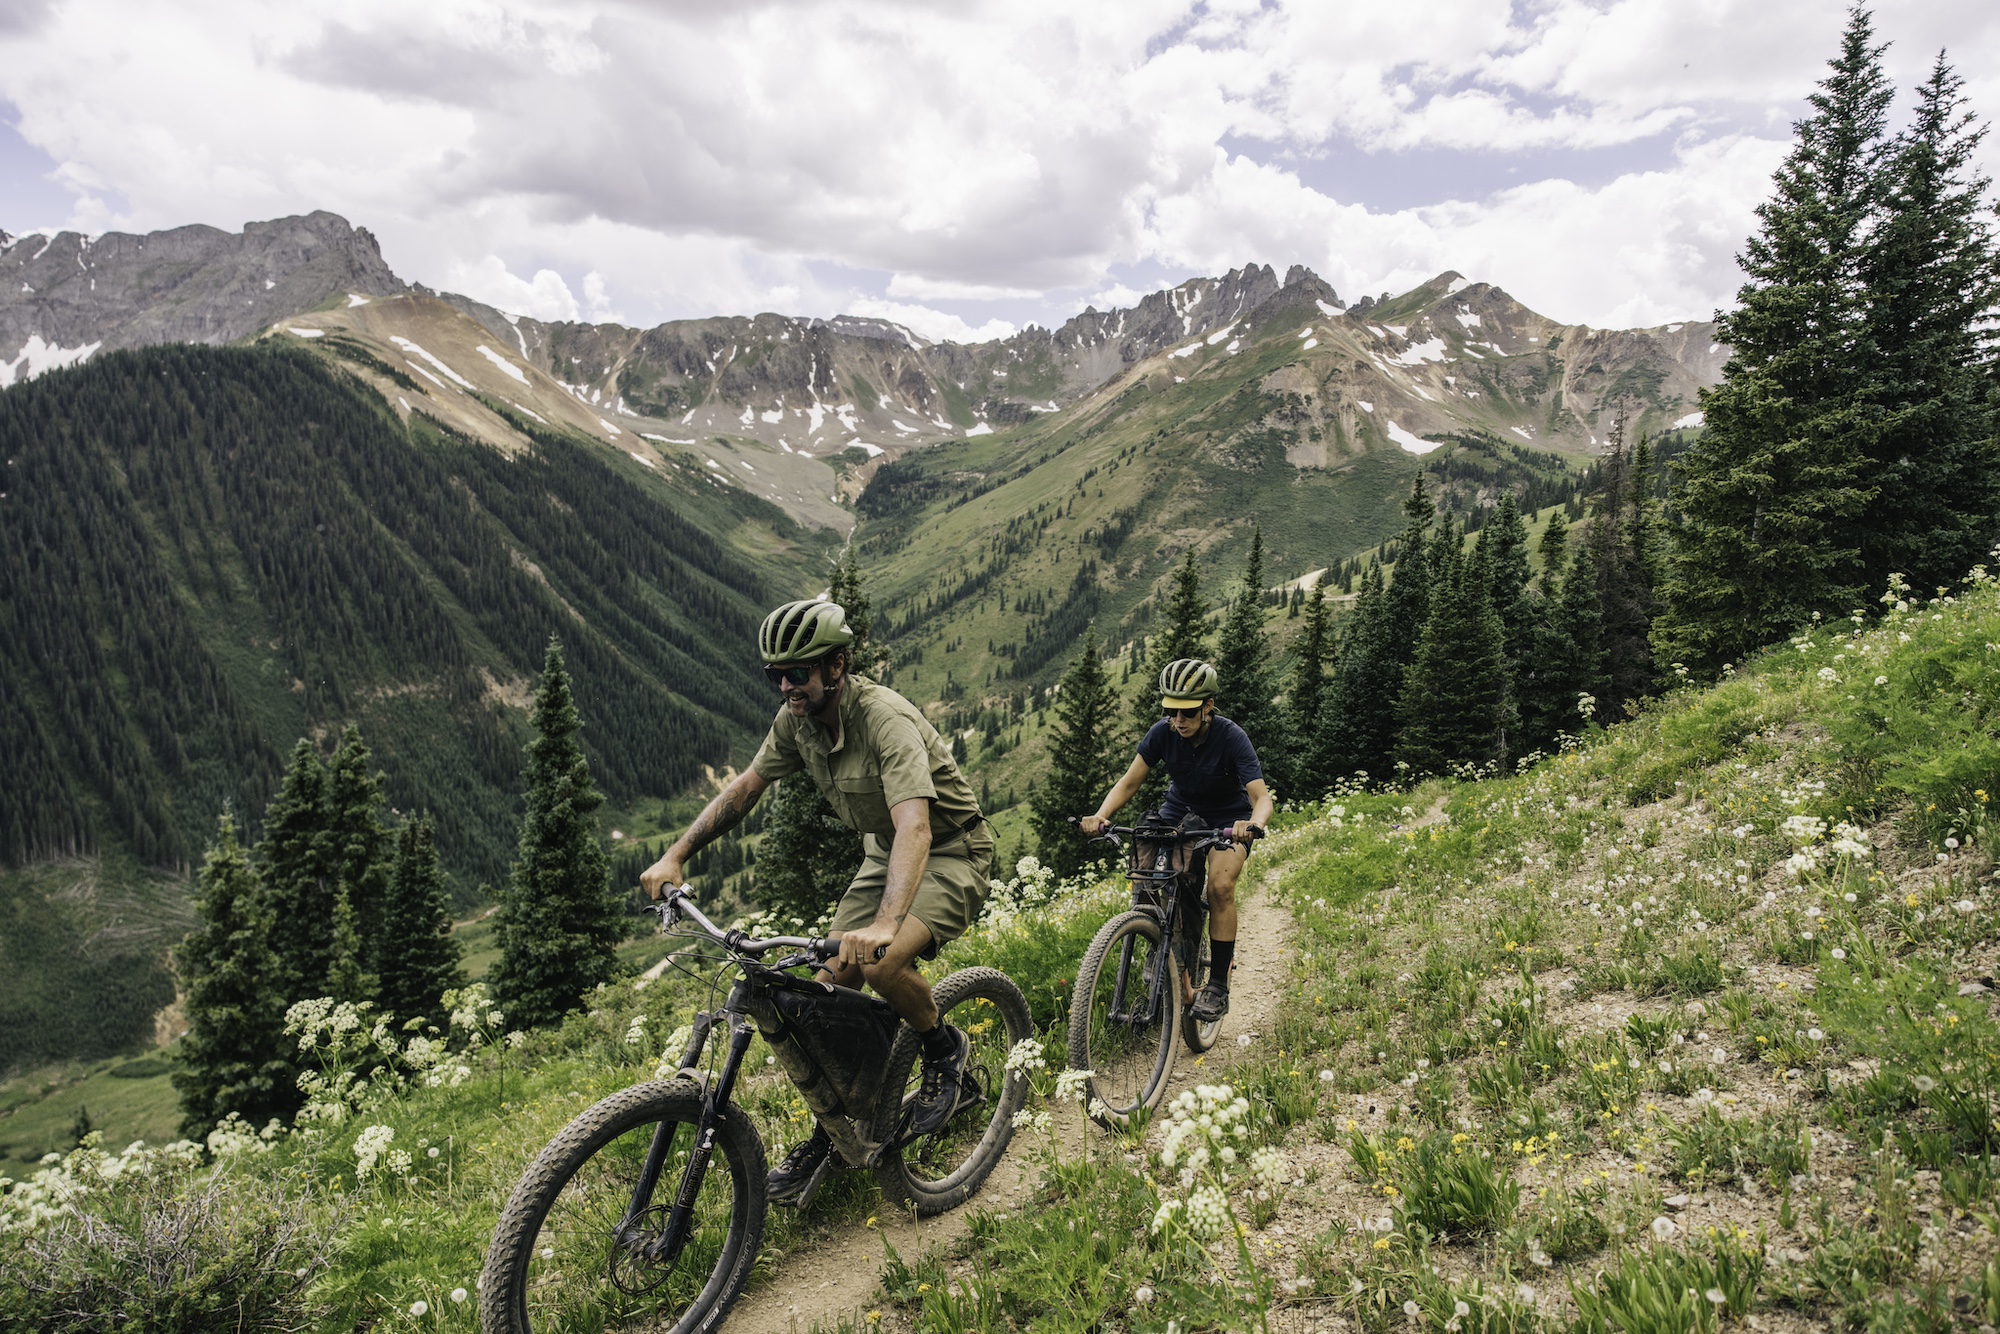
I needn't have worried. Sure, we did roll out from Durango late afternoon in 95-degree weather. And yes, the mosquitoes and flies were relentless, and I was forced to make peace with walking my bike rather than riding it. And my carbon-soled shoes and suspension fork ended up in the trash upon return to Durango but it was, indeed, all 'worth the effort' — just as Sarah had promised.
The monsoons never really made an appearance, temperatures were pretty ideal once at elevation, and the rewards for our efforts were immense. Each turn revealed a new vista, a sweeping valley, a creek crossing or dense forests. The iron-rich soil shone brightly in its red and orange hues, marmots whistled cheerfully to one another, and no two trails were alike. From narrow and exposed singletrack to gravel paths and challenging rocky passes — I loved it all.
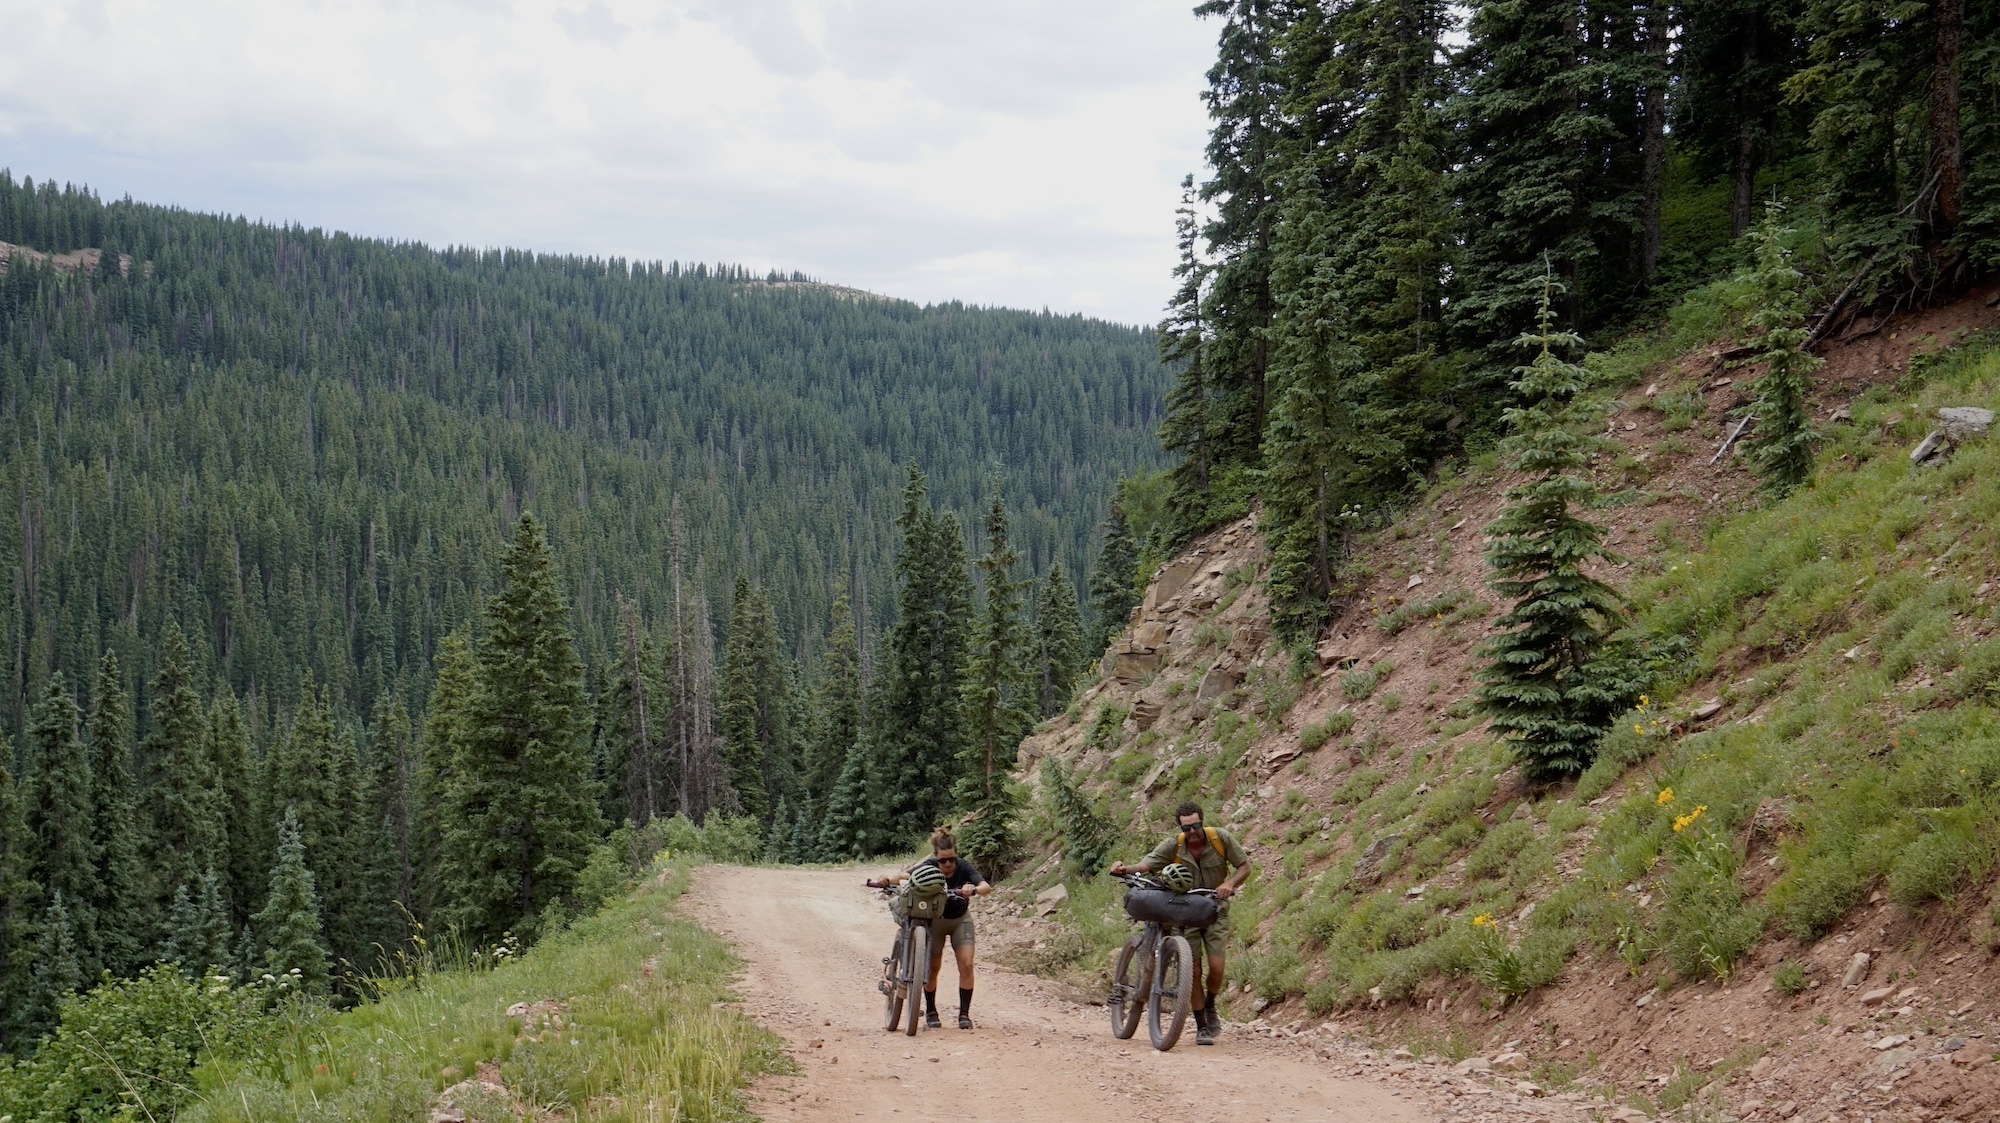
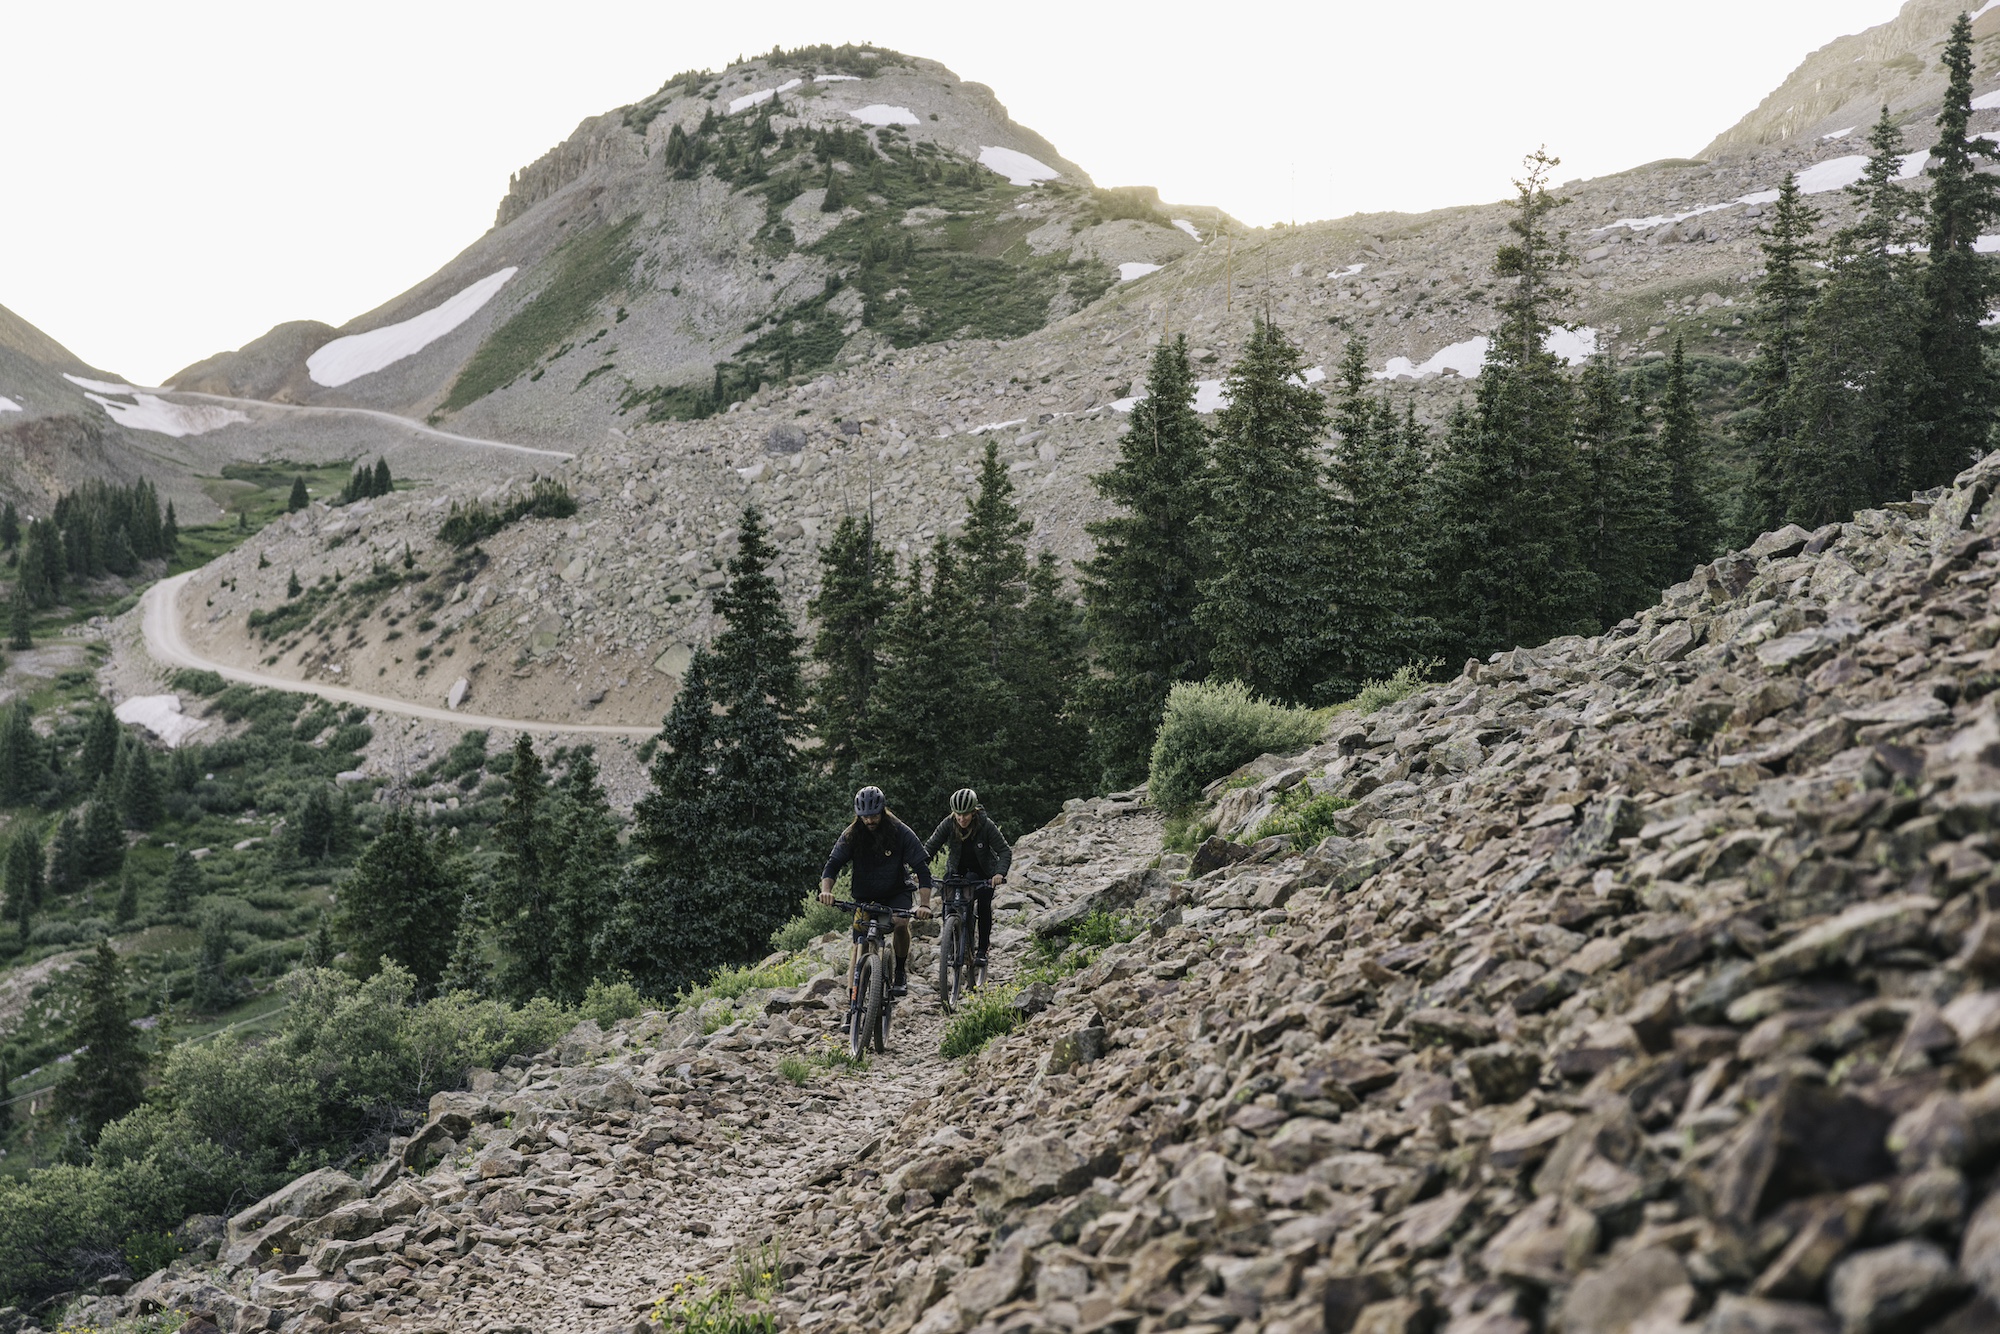
Sarah Swallow and Steve Fassbinder hike their bike up yet another mountain pass
Salty, spent and satiated after enjoying a sunset camp dinner, there was a blissful sense of calm as we crawled into our bivies at the end of each night. Mostly, I was left with a burning desire for more, more, more. Three-and-a-half days were a mere taster of what the San Juan mountains have to offer.
Ophir Pass
Ophir Pass
Ophir Pass Road is some eight miles long and ascends 2200 feet until it tops out at 11,789 feet. Like many mountain passes in the area, the unpaved road was first utilized during the region's mining boom in the late 19th century and served as a main transportation route for miners, pack animals and wagons. It was a vital link between Ophir, Telluride and Silverton.
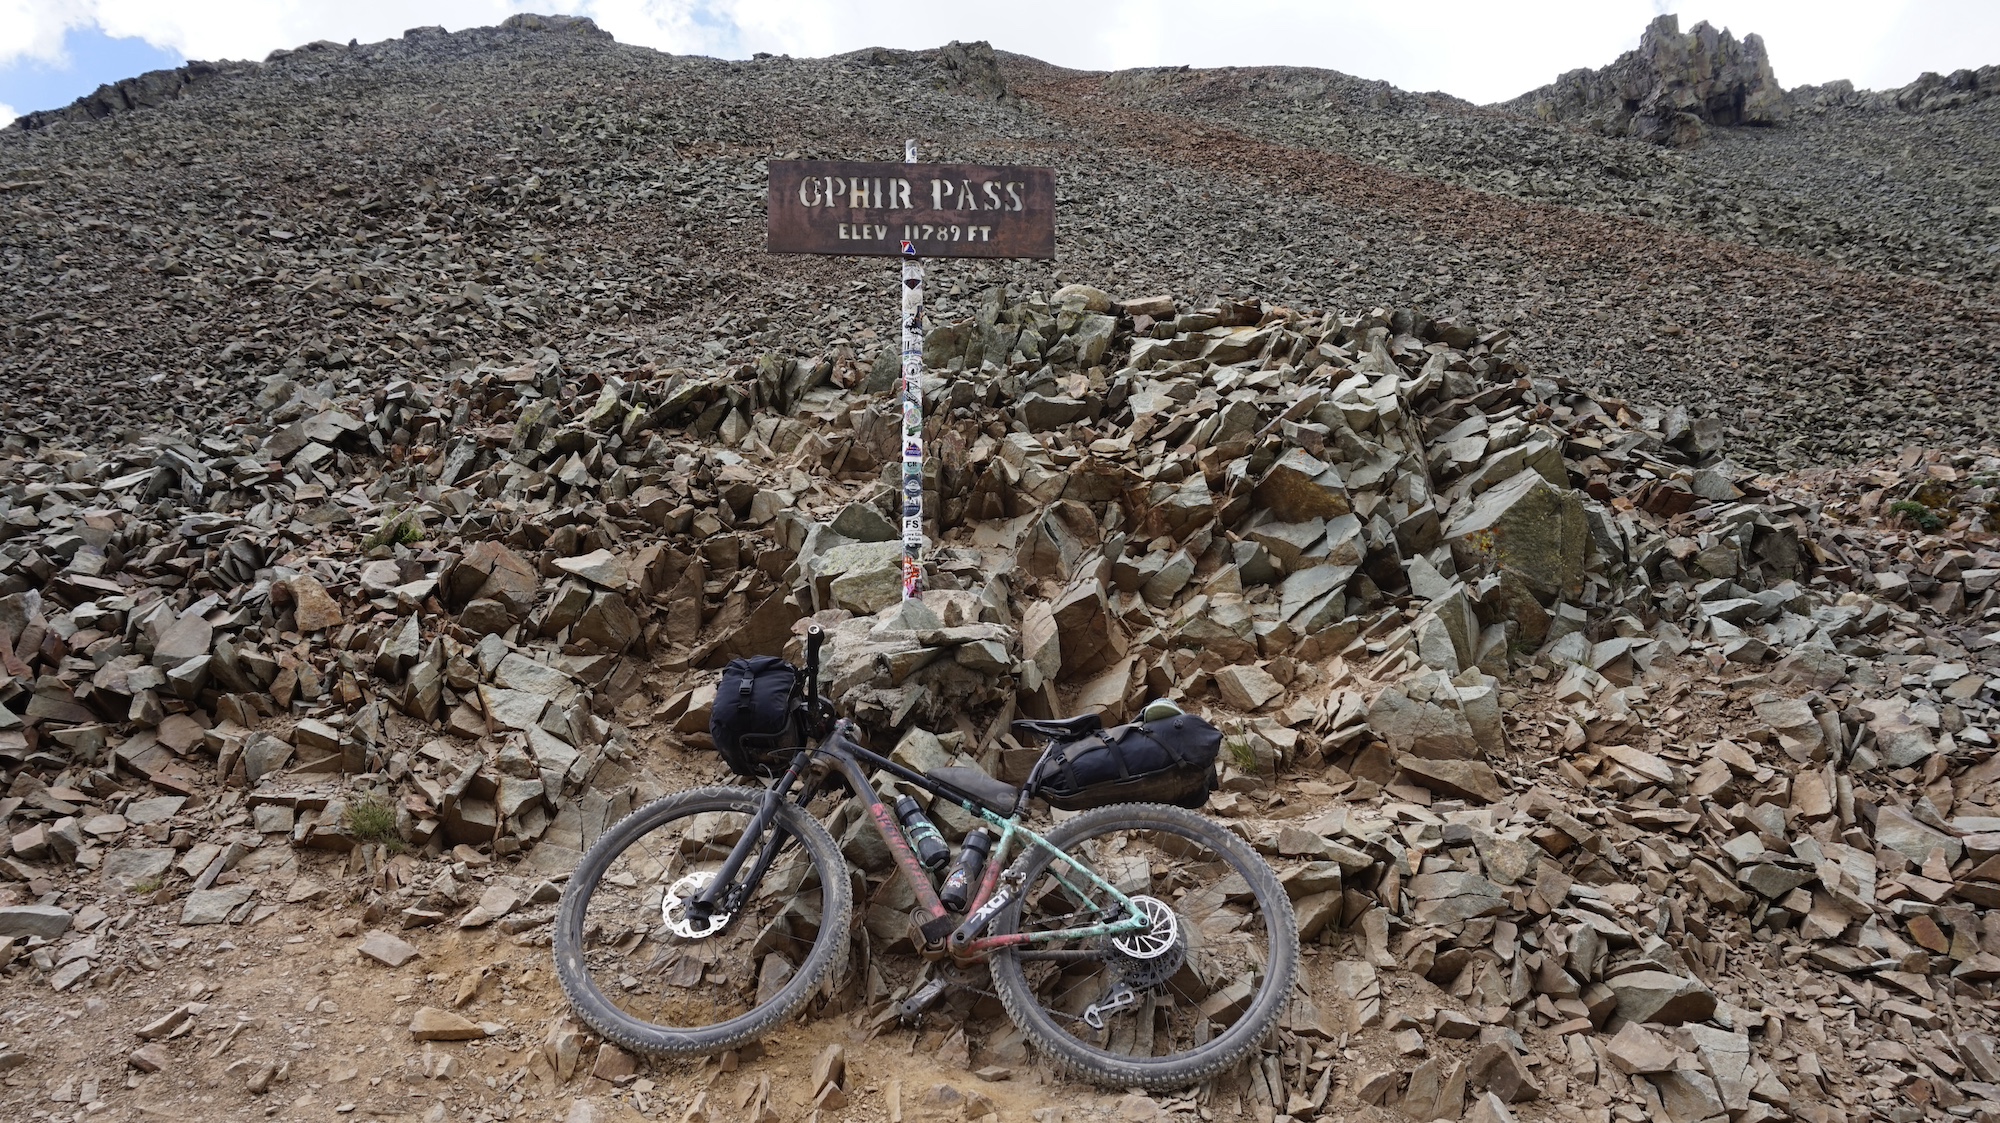
Today, the scenic and challenging route is a popular jeep, hiking and biking trail. We were warned that the rough terrain and steepness would make this a 1.5-2-hour hike-a-bike.
Columbine Lake - 12,700 feet
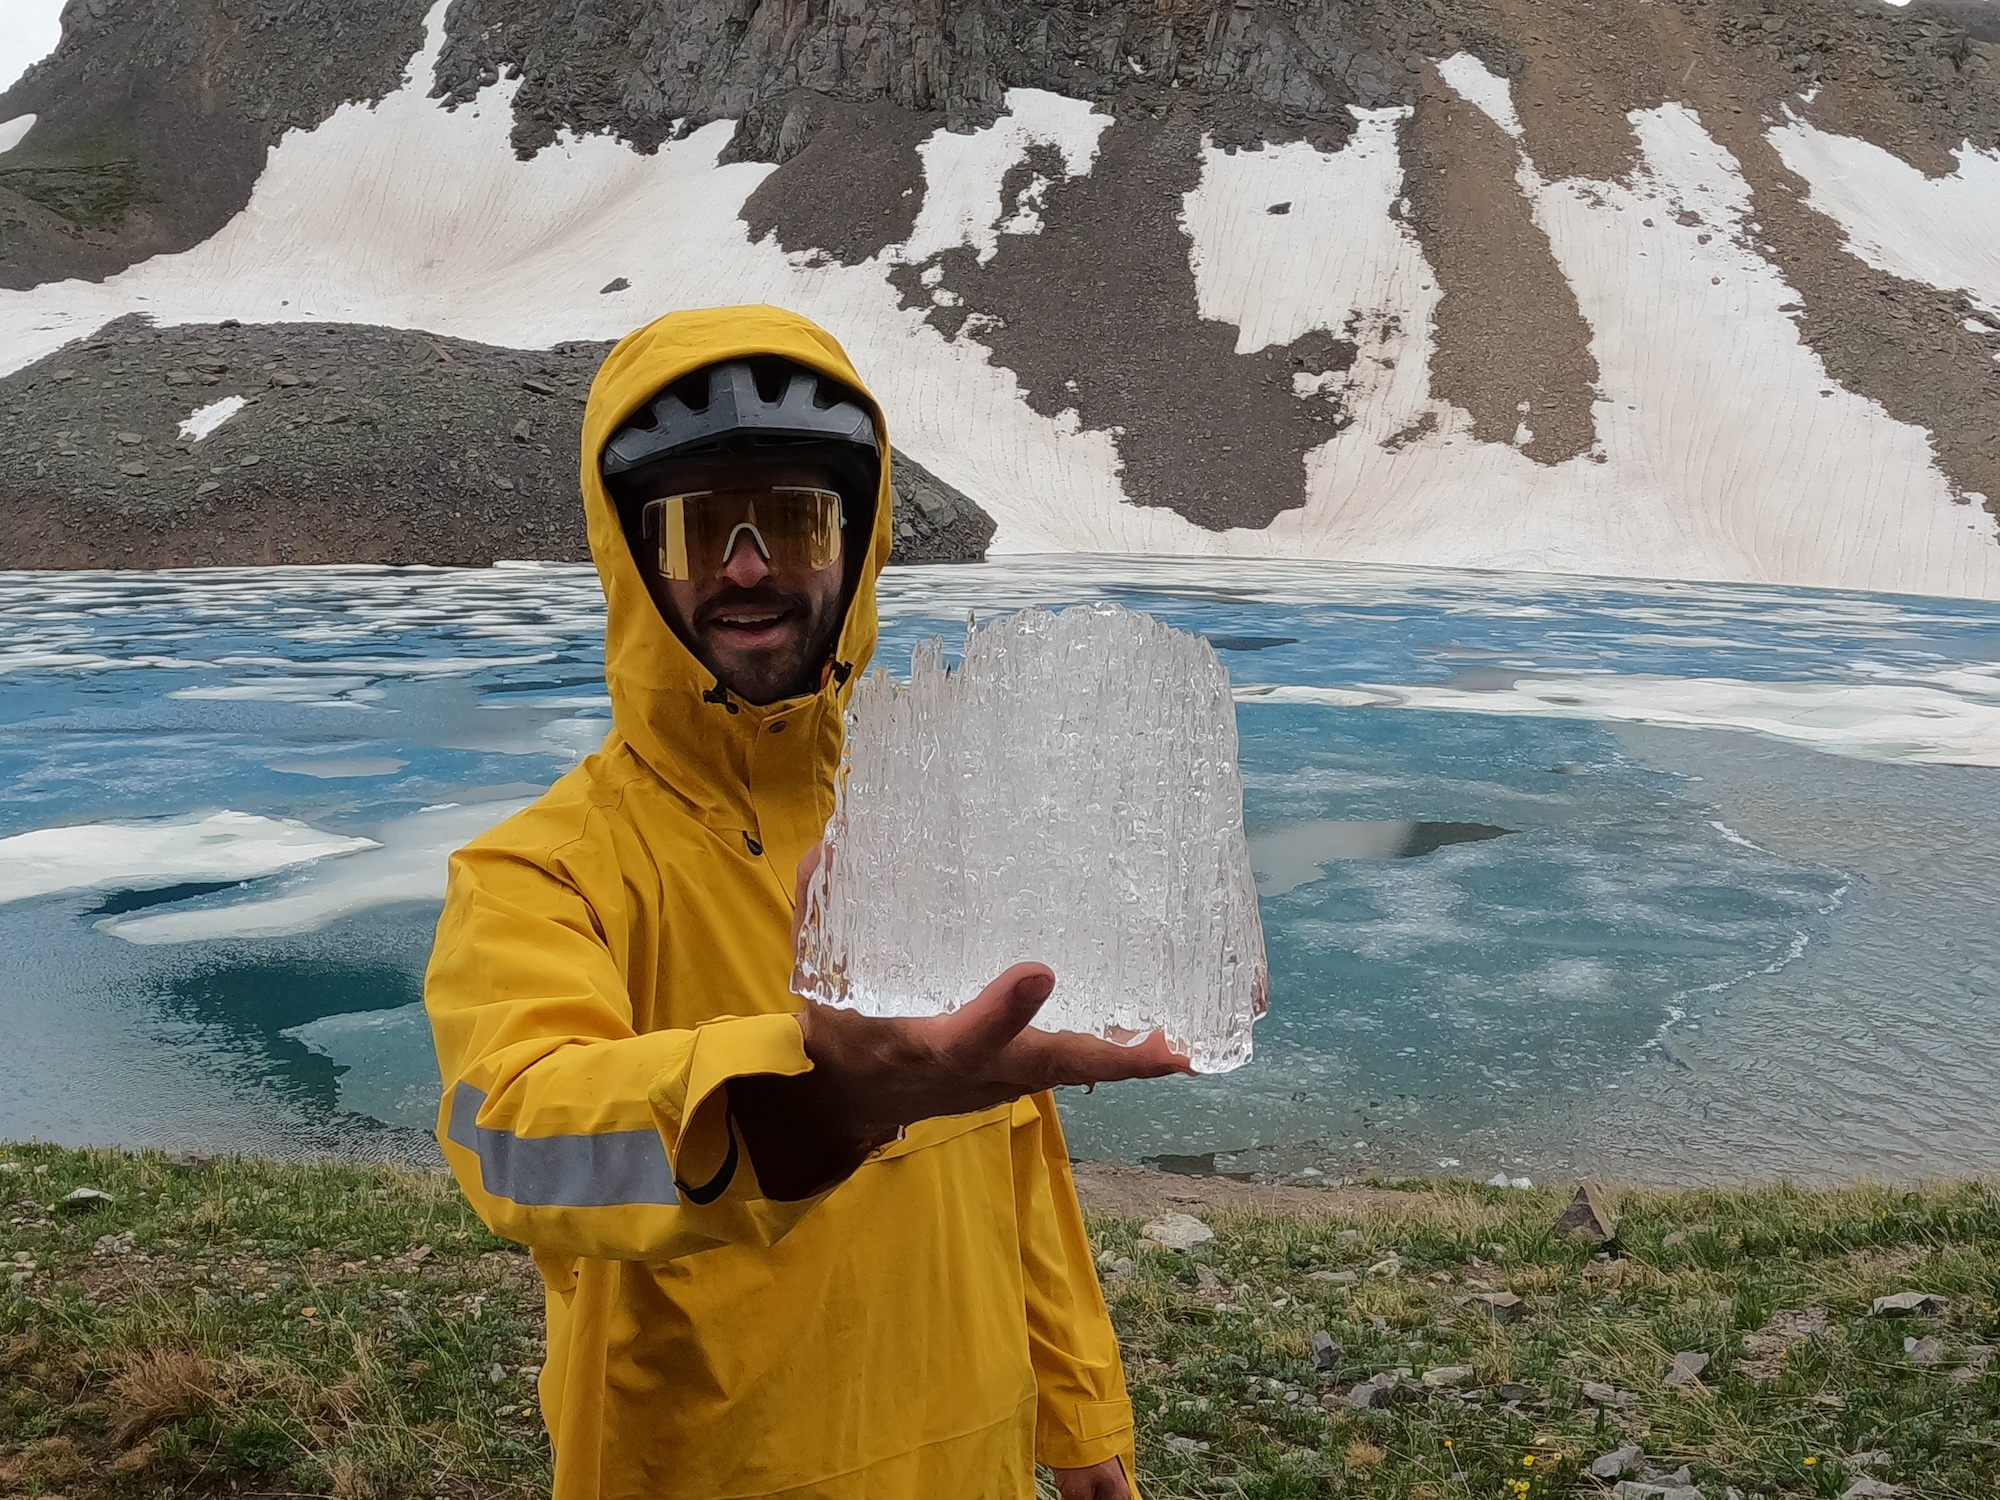
James Nixon at Columbine Lake
Columbine Lake was both a really cool sight and an exercise in mental strength for me. We'd already hike-a-biked up Ophir Pass that day and by now, the carbon fibers of my shoe soles were poking through on the inside, and cutting up my feet. The trip up to the alpine lake was meant to be a quick, unloaded, pre-dinner excursion but turned into a bit of a trek as we schlepped and accrued our steeds some 2000 feet up to the lake through snow fields.
"Is it worth it?" I asked Sarah. And when she started showing even a hint of doubt, I nearly turned around. But we trekked on to find a completely deserted scene of icy beauty. A mosaic of white and blue, where snow-covered plains met the frigid water, the strong winds playing with the floating ice.
The way back down to the hut was sheer joy as we 'skied on bikes', plowing through the snow, using our bikes like adult-sized balance bikes.
The Region's Mining History
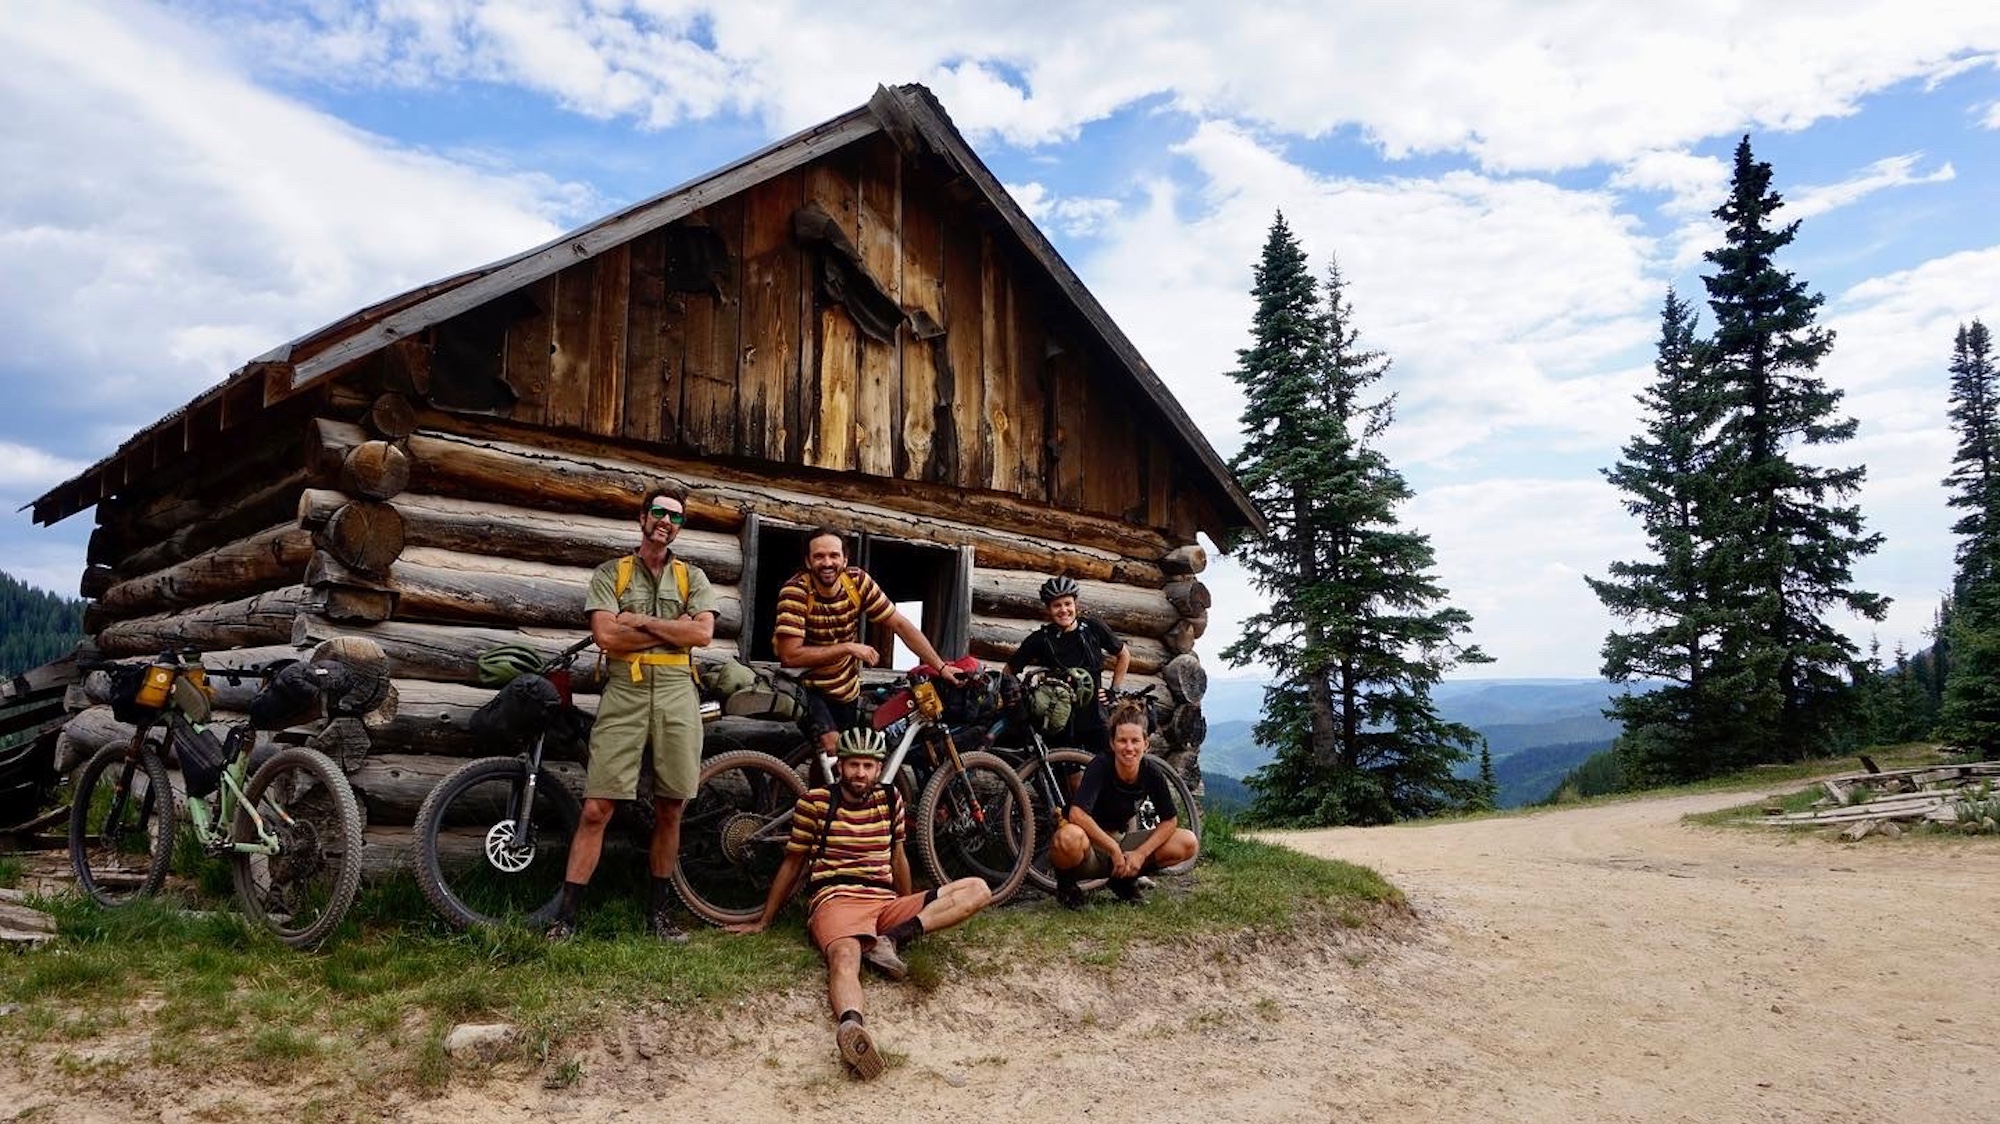
The crew at an abandoned cabin: Steve Fassbinder, James Nixon, Andy Cochrane, Sarah Swallow, Anne-Marije Rook
We ended our trip in the historic town of Silverton – a perfect example of the region's rich mining history. Throughout the region, you can spot remnants of the Colorado Silver Boom of the 1880s.
The boom brought a lot of wealth and an increased population to the mountains, yet it ended almost as abruptly as it started. On our trip, we spotted abandoned cabins, decommissioned mines and old railways.
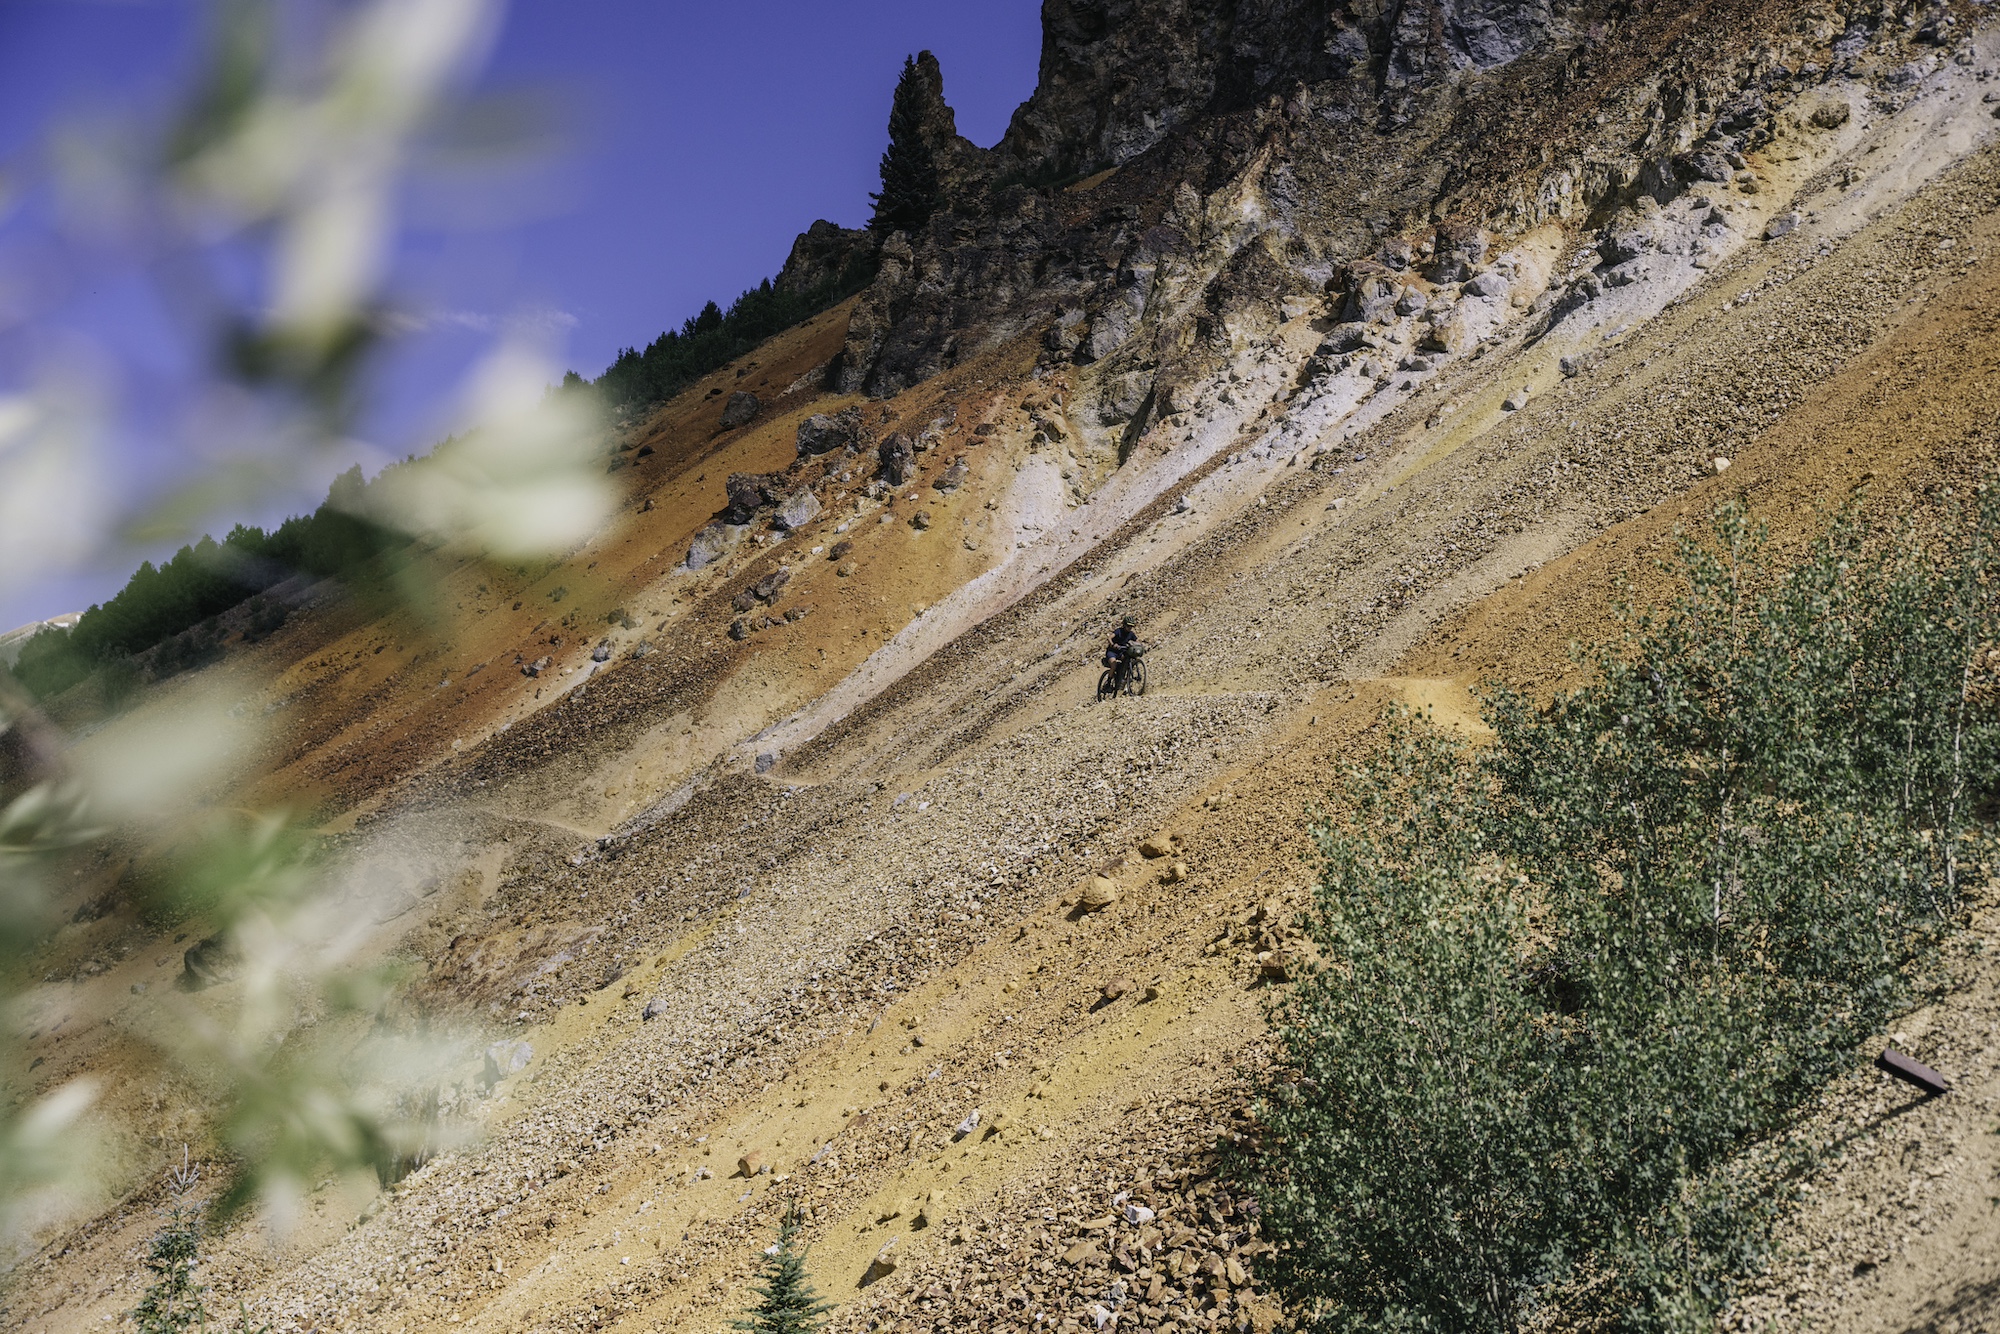
Our last pass before descending into Silverton
The Route
Save this link for a future adventure!
The Gear
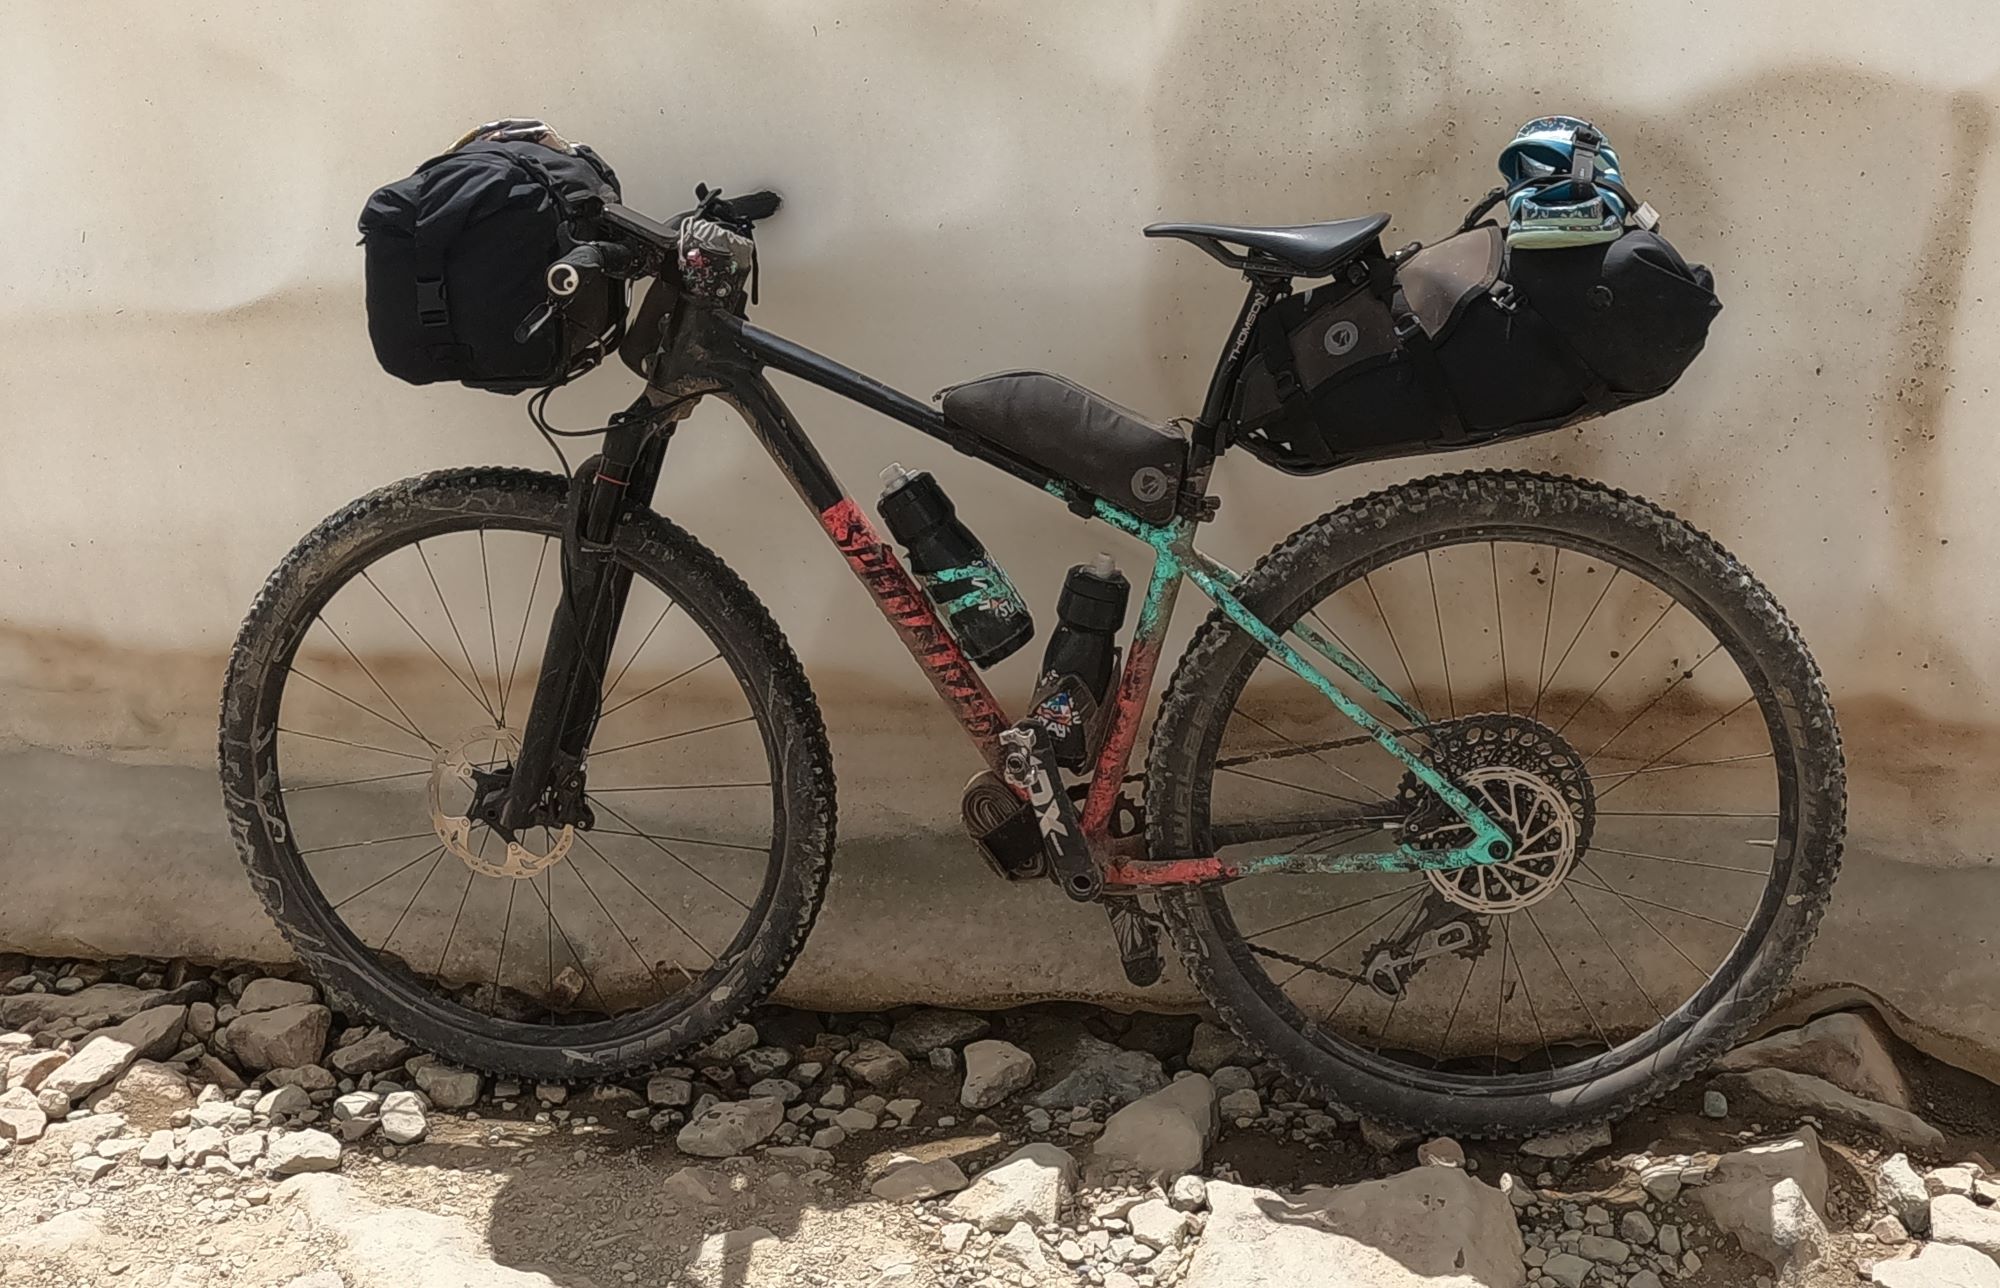
The San Mountains proved the perfect testing ground for Fjällräven's latest drop of bikepacking gear.
Founded in 1960, Fjällräven is a Swedish outdoor clothing and equipment brand known for its high-quality, durable hiking products, particularly its backpacks and outdoor clothing. In 2022, it entered the bike market in partnering with Specialized, exchanging one's brand of expertise for the other. With items such as hard-case panniers and totes, the first two "drops", featured gear that serves both commuters and those exploring the great nearby on short overnighters.
Drop 3 is a more serious entry into the bikepacking space with a spacious dry bag and seat pack harness, handlebar bag, frame bag, toptube bag and a snack pack. There's even an ingenious poncho that turns into a sleeping bag.
Here's the gear I used on my trip into the San Juans.
The Specialized/Fjällräven Handlebar Rack with Roll Top Bag
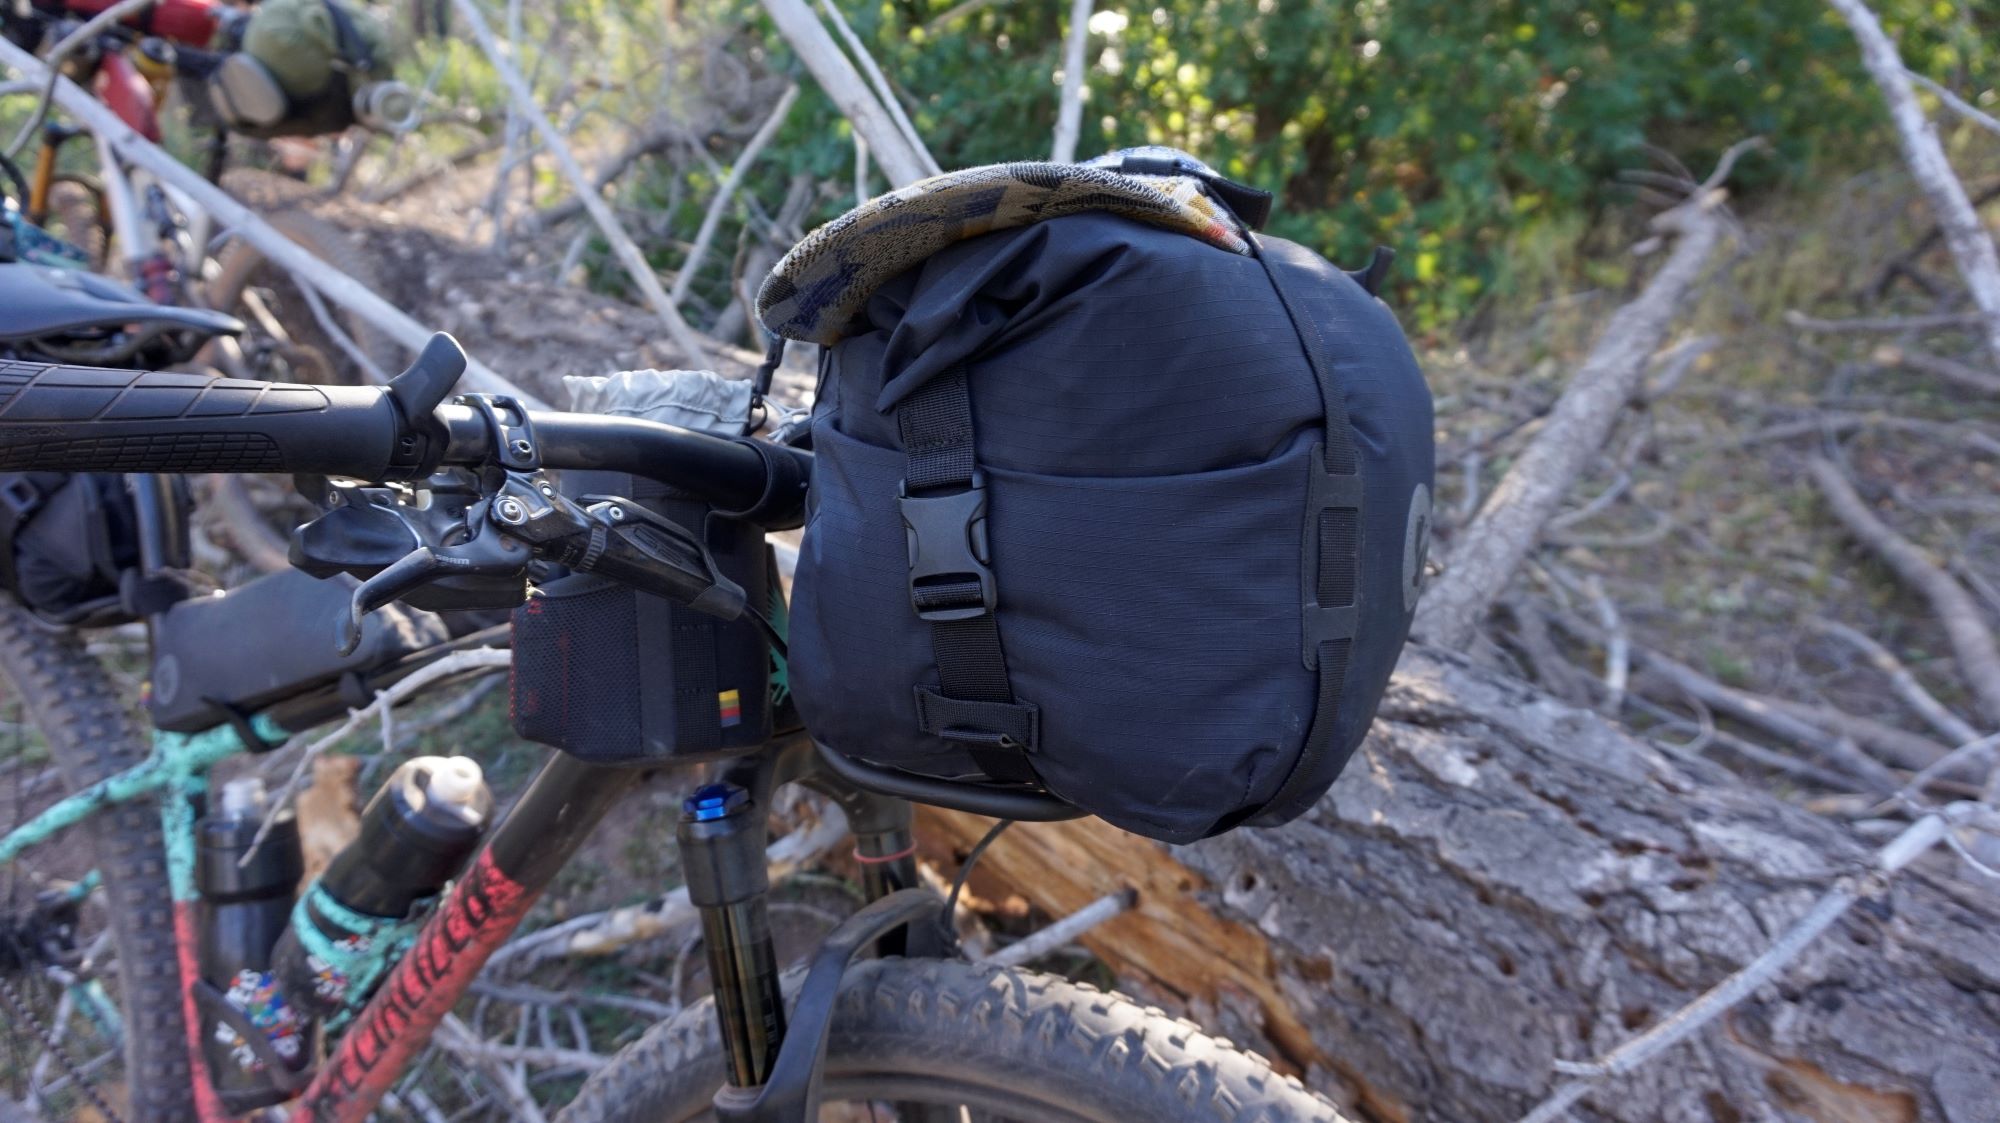
Specialized / Fjallraven Handle Bar Bag
I've been using this setup on my commuter bike all year – even before the trip. The aluminum rack attaches directly to your (31.8mm) handlebars and is secured from movement under load by an anti-rotation guyline that wraps around your stem. The bottom of the rack features various mounts should you want to attach lights, a GoPro or other accessories.
At 20 x 18 x 13 cm, the rack is unobtrusive yet strong enough to carry 5 kg /11 lbs. For my day-to-day, this rack and roll top bag combo carries my groceries or errands, for bikepacking, one can use the rack by itself with one's own bag or use it to strap a tent to it. In Colorado, I used the S/F Handlebar Roll Top Bag, which can hold an impressive 13 liters worth of clothing, gear and food. This is where I carried my stove and fuel, food, toiletries and a layer of clothing or two.
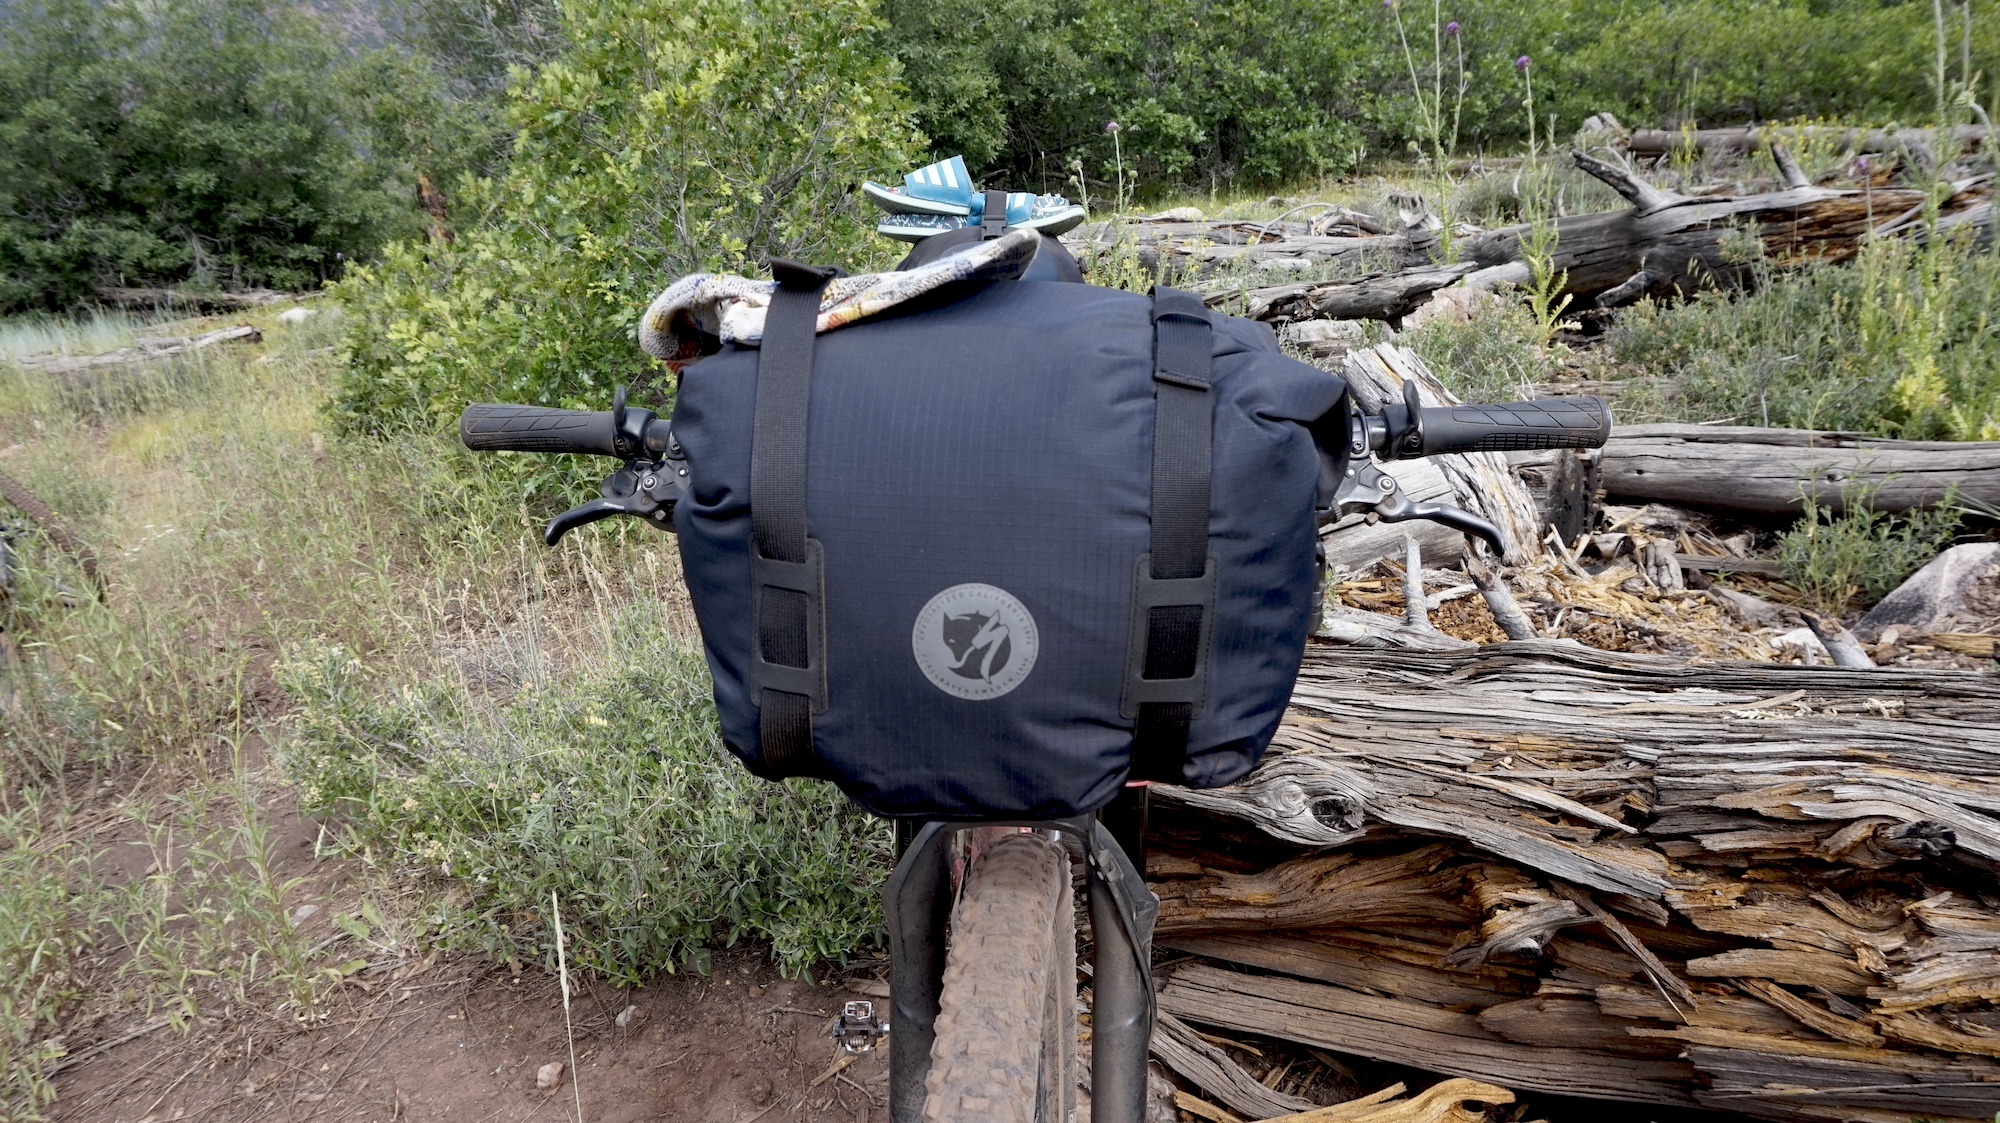
The bag has three different attachment points to the rack, ensuring that it won't come off – not even on the bumpiest of mountain bike trails. The bag itself is made of a lightweight waterproof ripstop material and features a wide, roll-top opening for easy access and two sets of buckle closures. There are vertical compression straps to cinch everything down, and even fully loaded, the bag was remarkably sturdy.
I accidentally overloaded my bag once, causing the guyline to fail and the rack to tip forward. Sadly, the thin fabric stood no chance against tire rub and tore easily. That, however, was user error, so be mindful of the five kg-weight limit.
S/F Seatbag Harness with S/F 16L Dry Bag
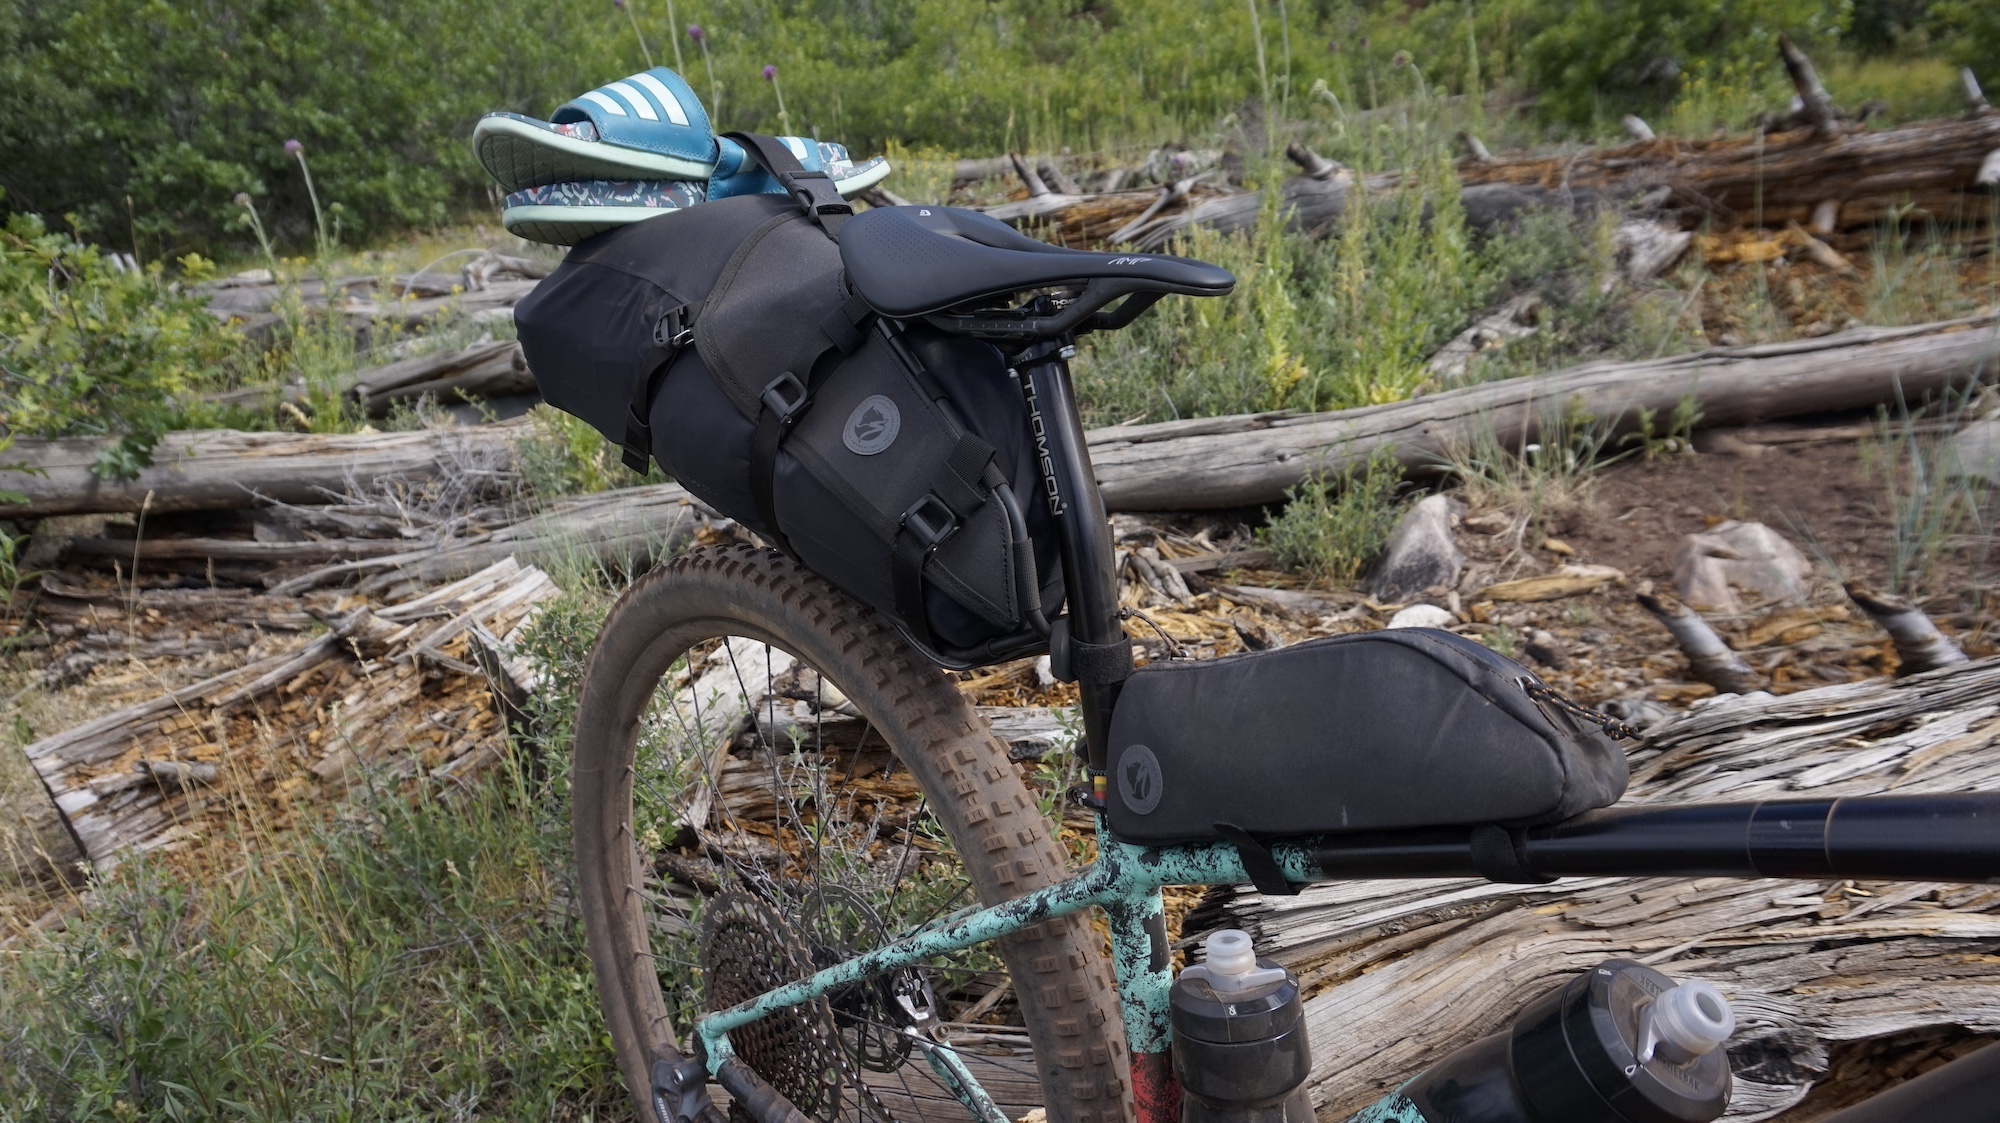
While many bikepacking saddlebags or seatpacks feature its own built-in frame or rigidity, Fjällräven opted for a two-piece system consisting of a stabilizing harness that attaches to the seatpost and saddle rails and a separate dry bag insert. Portland Design Works, Restrap and Blackburn all make something similar, and the idea is that this system is not only more stable (-- you won't have your bag swinging all over the place–), it also allows for more flexibility in bag capacity. After all, some trips require more gear than others. The downside is that the system adds weight.
In this case, the harness consists of an aluminum frame with some rigid webbing in between, a series of compression straps and quick-release camlock buckles, and a saddle rail mount. This comes out at an added 625g before adding the dry bag and a load of cargo. In all honestly, when it comes to backcountry bikepacking, I don't really care how much my carrying system weighs as long as it's solid and it doesn't rub my rear tire, which is a common problem on shorter bikes.
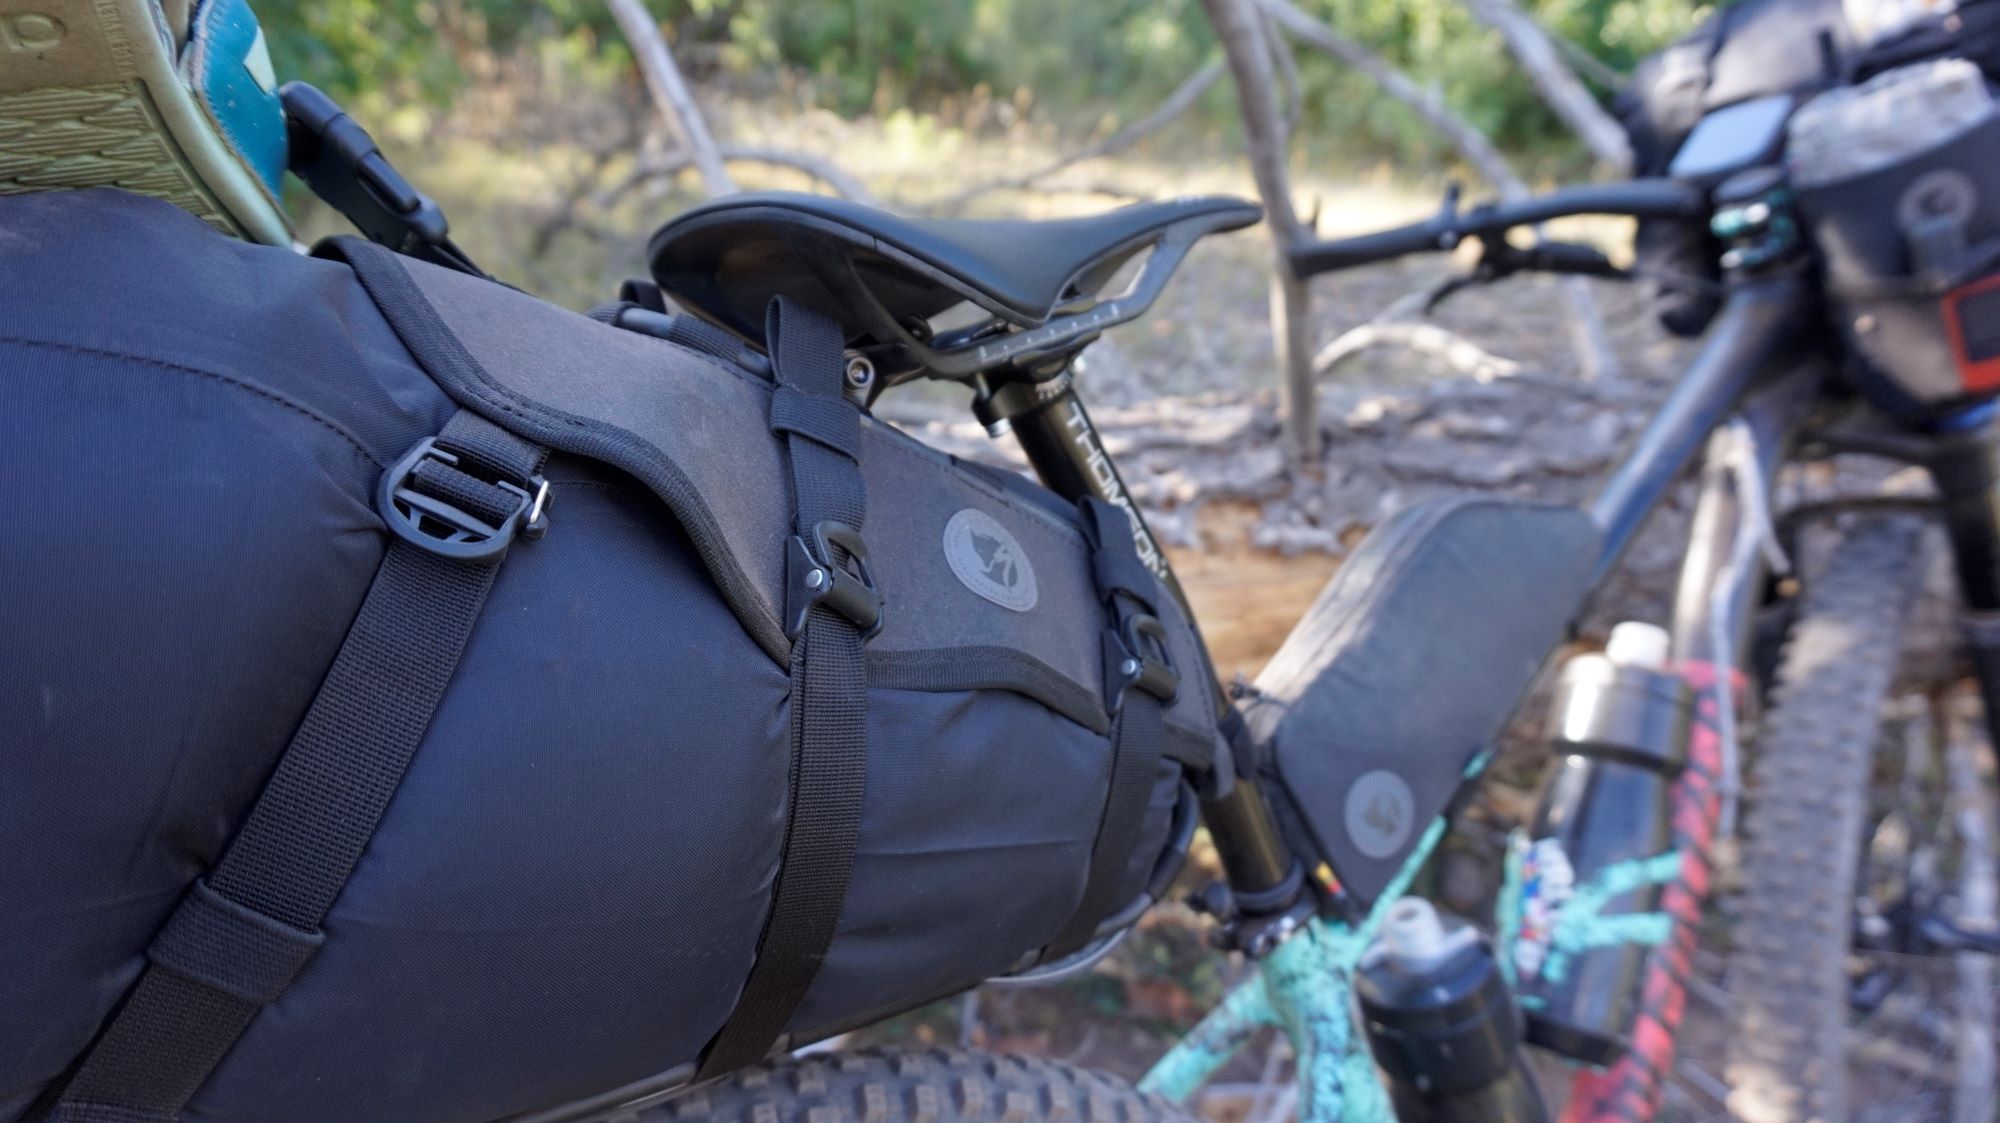
The S/F seatbag harness did its job well. It was rock solid. As the days went on and sand made its way in every crevice, the bag-and-harness-combo may have developed some creaking but continued holding my gear securely. I could trust that even on the biggest bump, my tire would only hit the harness – if that– and my drybag-contained belongings would be safe. I really appreciated the rigidity and sturdiness of the system so if weight is no concern, I'd gladly opt for this harness-and-dry-bag system over my usual go-to, Ortlieb's Seat Pack.
With that said, Fjallraven's harness has got to be one of the more complex systems out there. The process of taking the harness out of its packaging and onto my bike was a timely one and required a lot of consultation of the instructions. Now that I've done it once, however, I'm sure future setup will be much quicker.
The S/F 16 L Dry Bag is a good companion for the harness. Made of 100% recycled nylon, the bag is light yet waterproof. It features an air-release valve on the side for easy compression and a roll-top closure for easy packing. It was easy to use, appeared durable and comes in two colors – green and black– to match the earth tones of the entire S/F collection.
S/F Toptube Bag
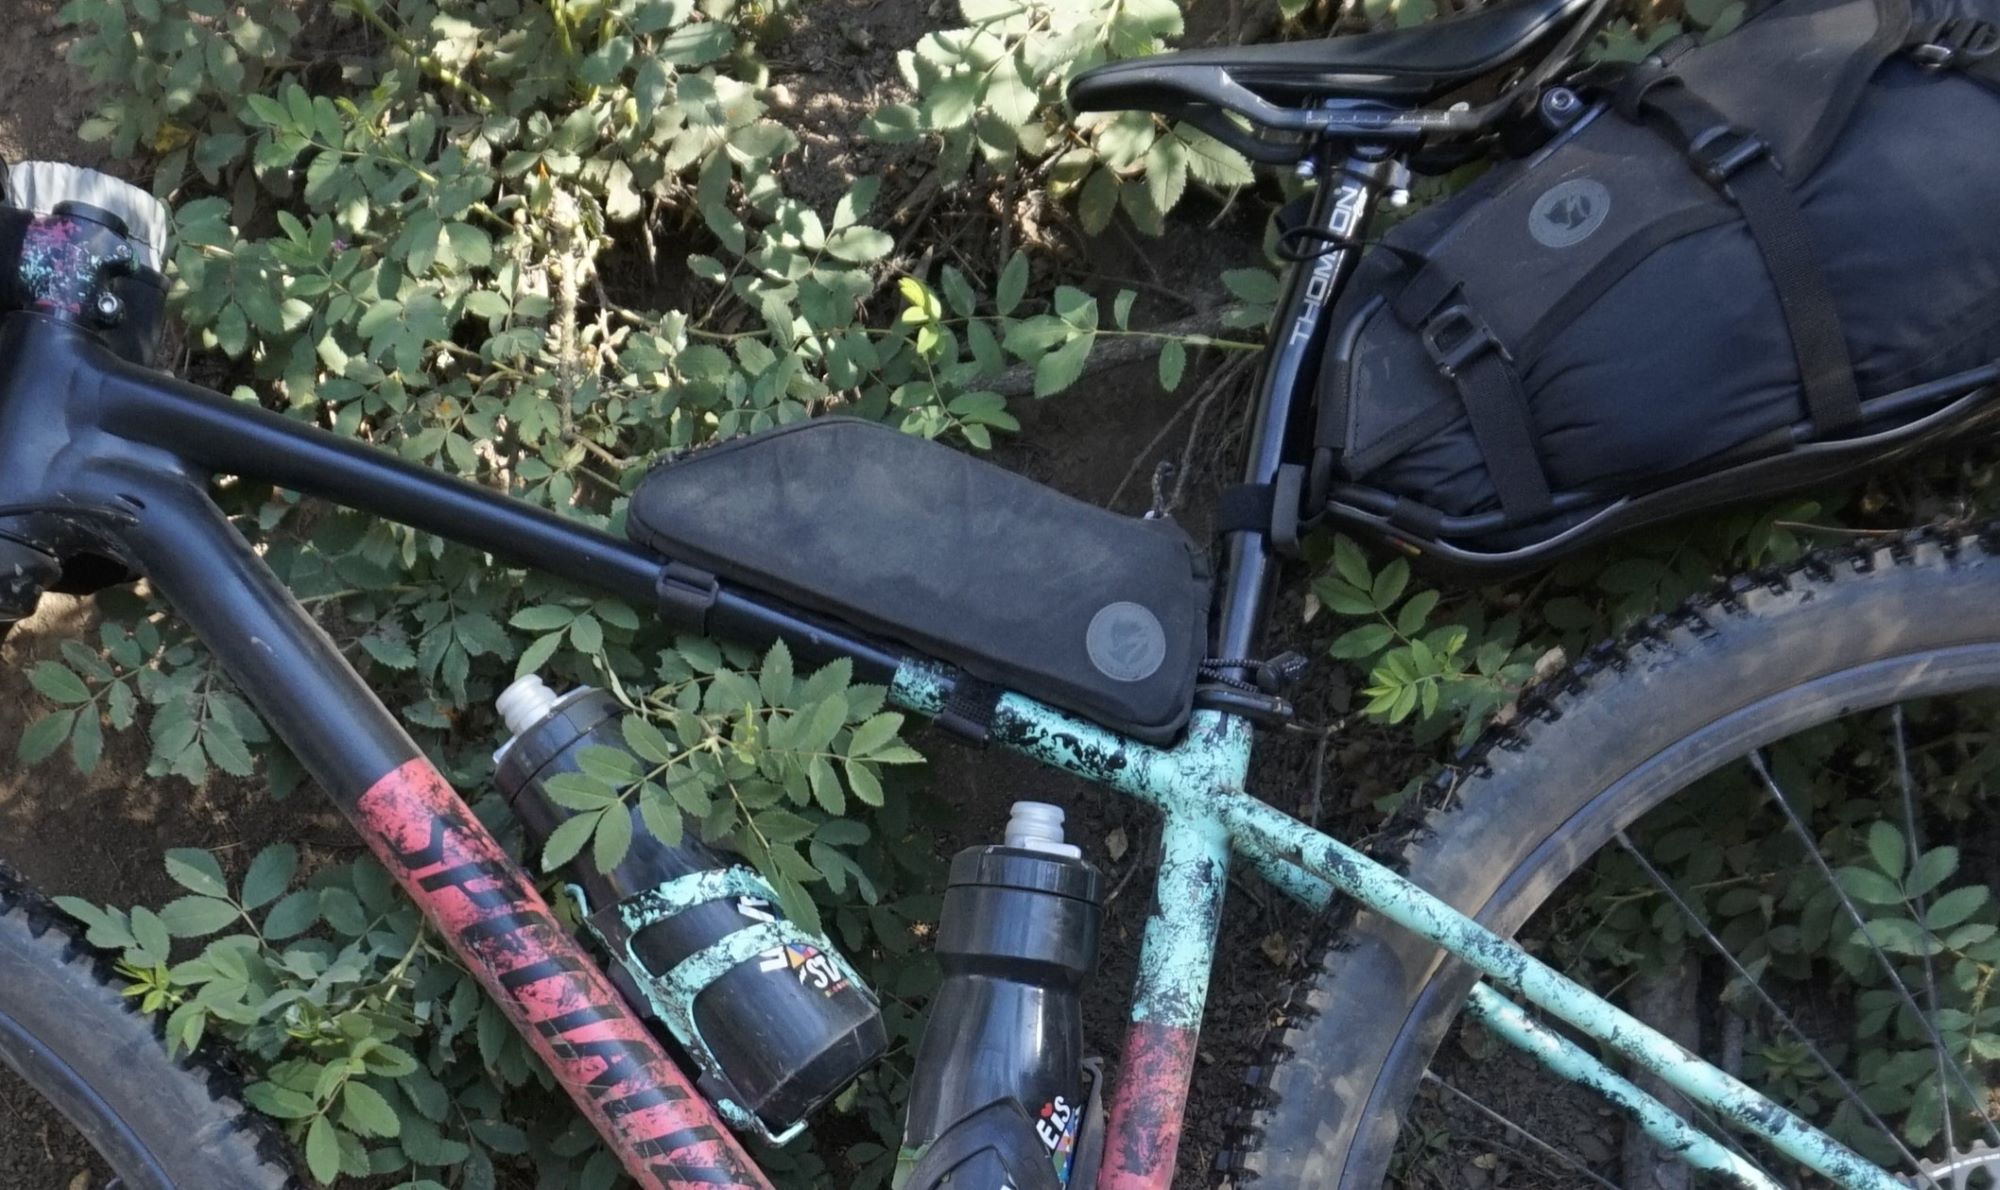
Specialized / Fjallraven Toptube bag
This is another item I'd been using long before this trip. It even survived the extremely muddy Unbound XL, which is a feat of its own because the zippers on some of my other bags did not survive the grit and grime.
Toptube bags are a dime a dozen these days. Every brand makes them now, but I purchased this one because of its sleek aesthetic, narrow shape and simple access. The two-way zipper provides entry to the bag's entire contents, stored in either the large main compartment or behind the mesh divider. The bag is made of a semi-soft vinyl exterior with a recycled nylon lining and foam-padded sides. The reinforced base has two top tube attachment options: screws if your bike has accessory mounts or velcro straps if it does not. There's a third strap for securing the back to your steerer tube or seat tube. I like the versatility here because it allows me to use the bag on different types of bike and/or in different locations. On this trip, I attached the bag to the rear end of the top tube, and fixed to the seat post. I used it to hold some fix-a-flat essentials, tools and gels.
Compact, the bag measures 10 cm x 26cm x 6cm and has a capacity of 0.8L
S/F Snack Bag
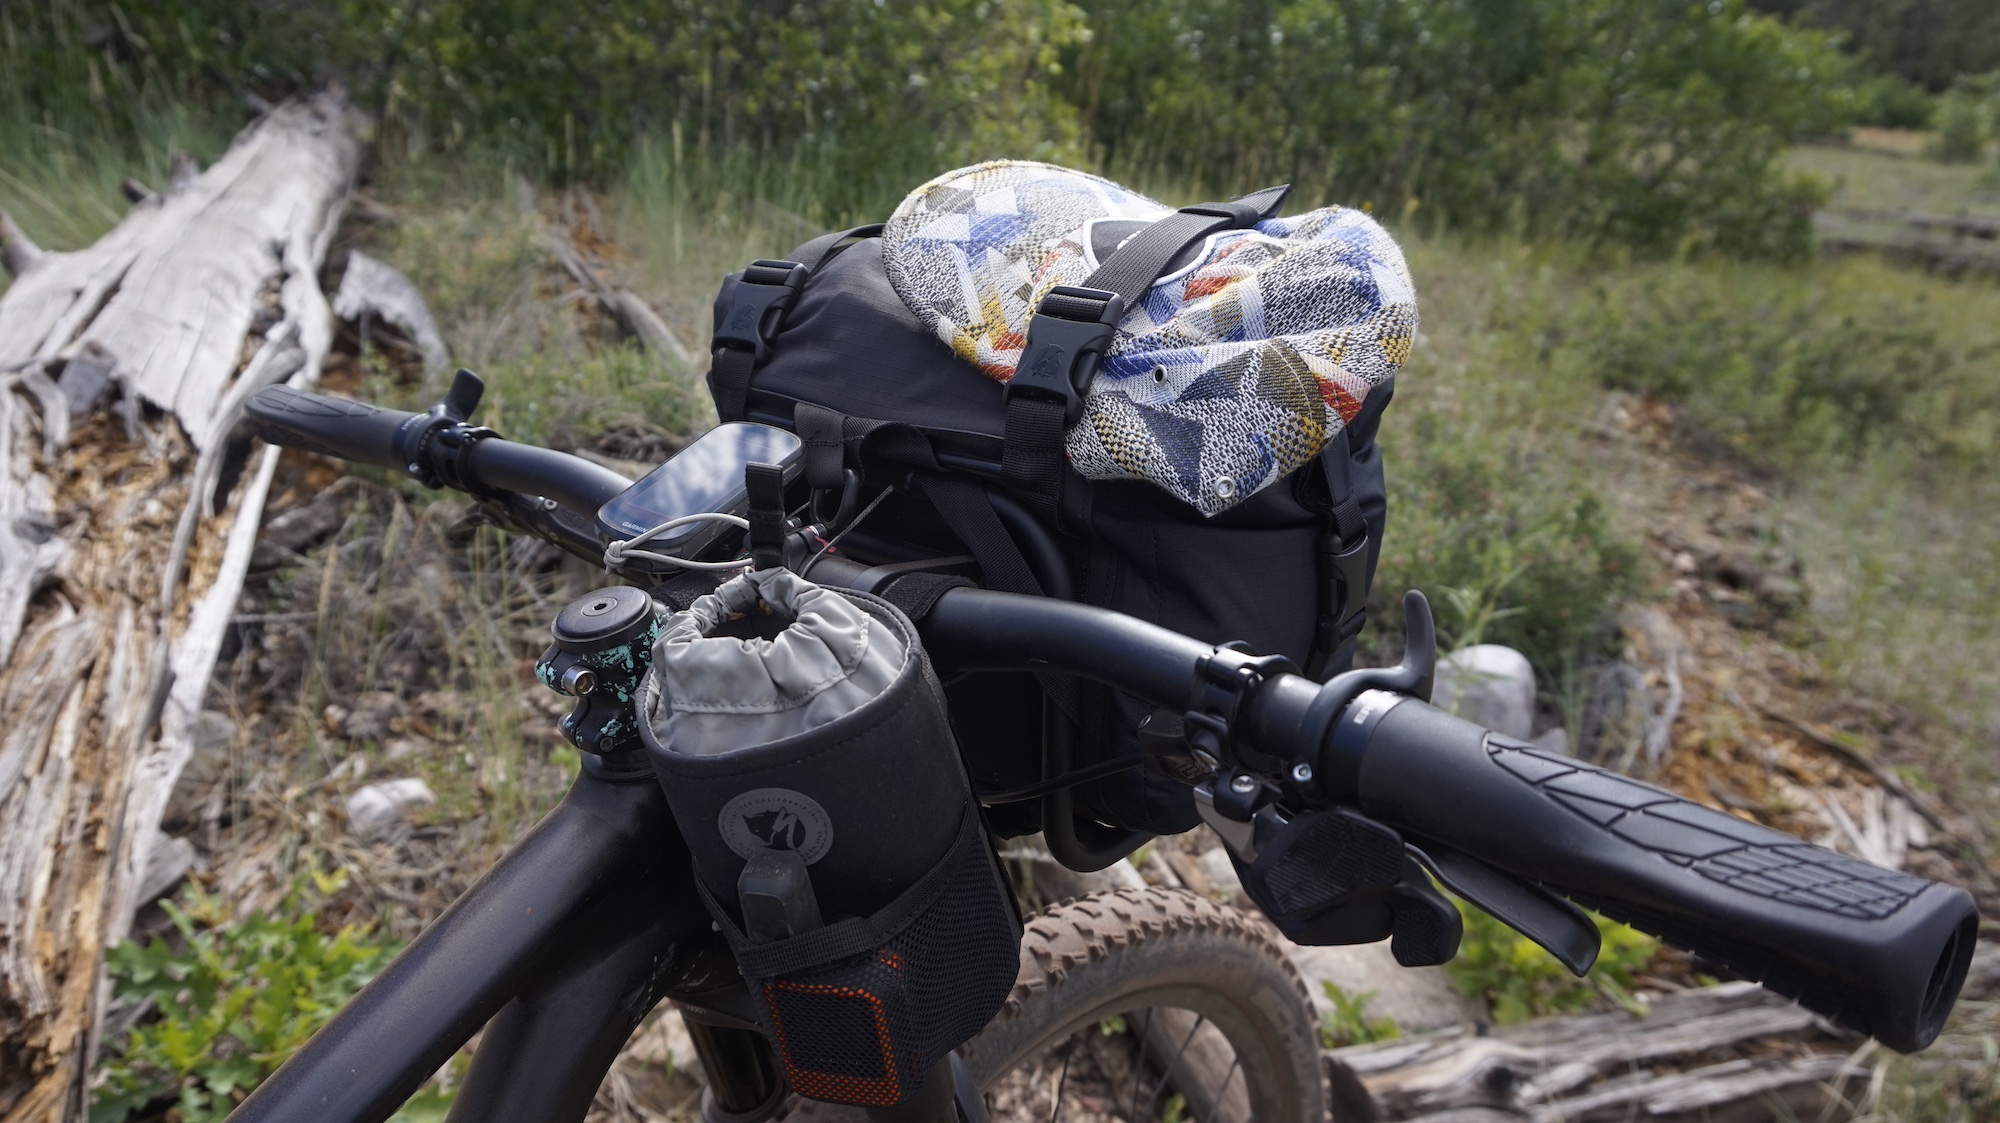
Specialized/ Fjällräven Snack Bag
The final bag I strapped to my bike on this trip was the Snack Bag. This, too, is an increasingly common bike-packing bag as it's so versatile.
A handlebar holder for an extra bottle, your snacks or, in this case, a camera, the bag keeps it all within grasp, literally. I like the S/F take on the classic Snack Bag as it's quite rigid thanks to its Vinylon material and all-around foam padding. Like most bags of its kind, the bag secures to your stem and handlebars by way of three velcro straps. A cinch-and-release closure on the inside of the bag keeps the 0.8L carrying capacity dry and protected. I also like the extra storage on the exterior of the bag for small items like a gel or a tool.
Women's Specialized/Fjällräven Cotton Pocket Short Sleeve Tee
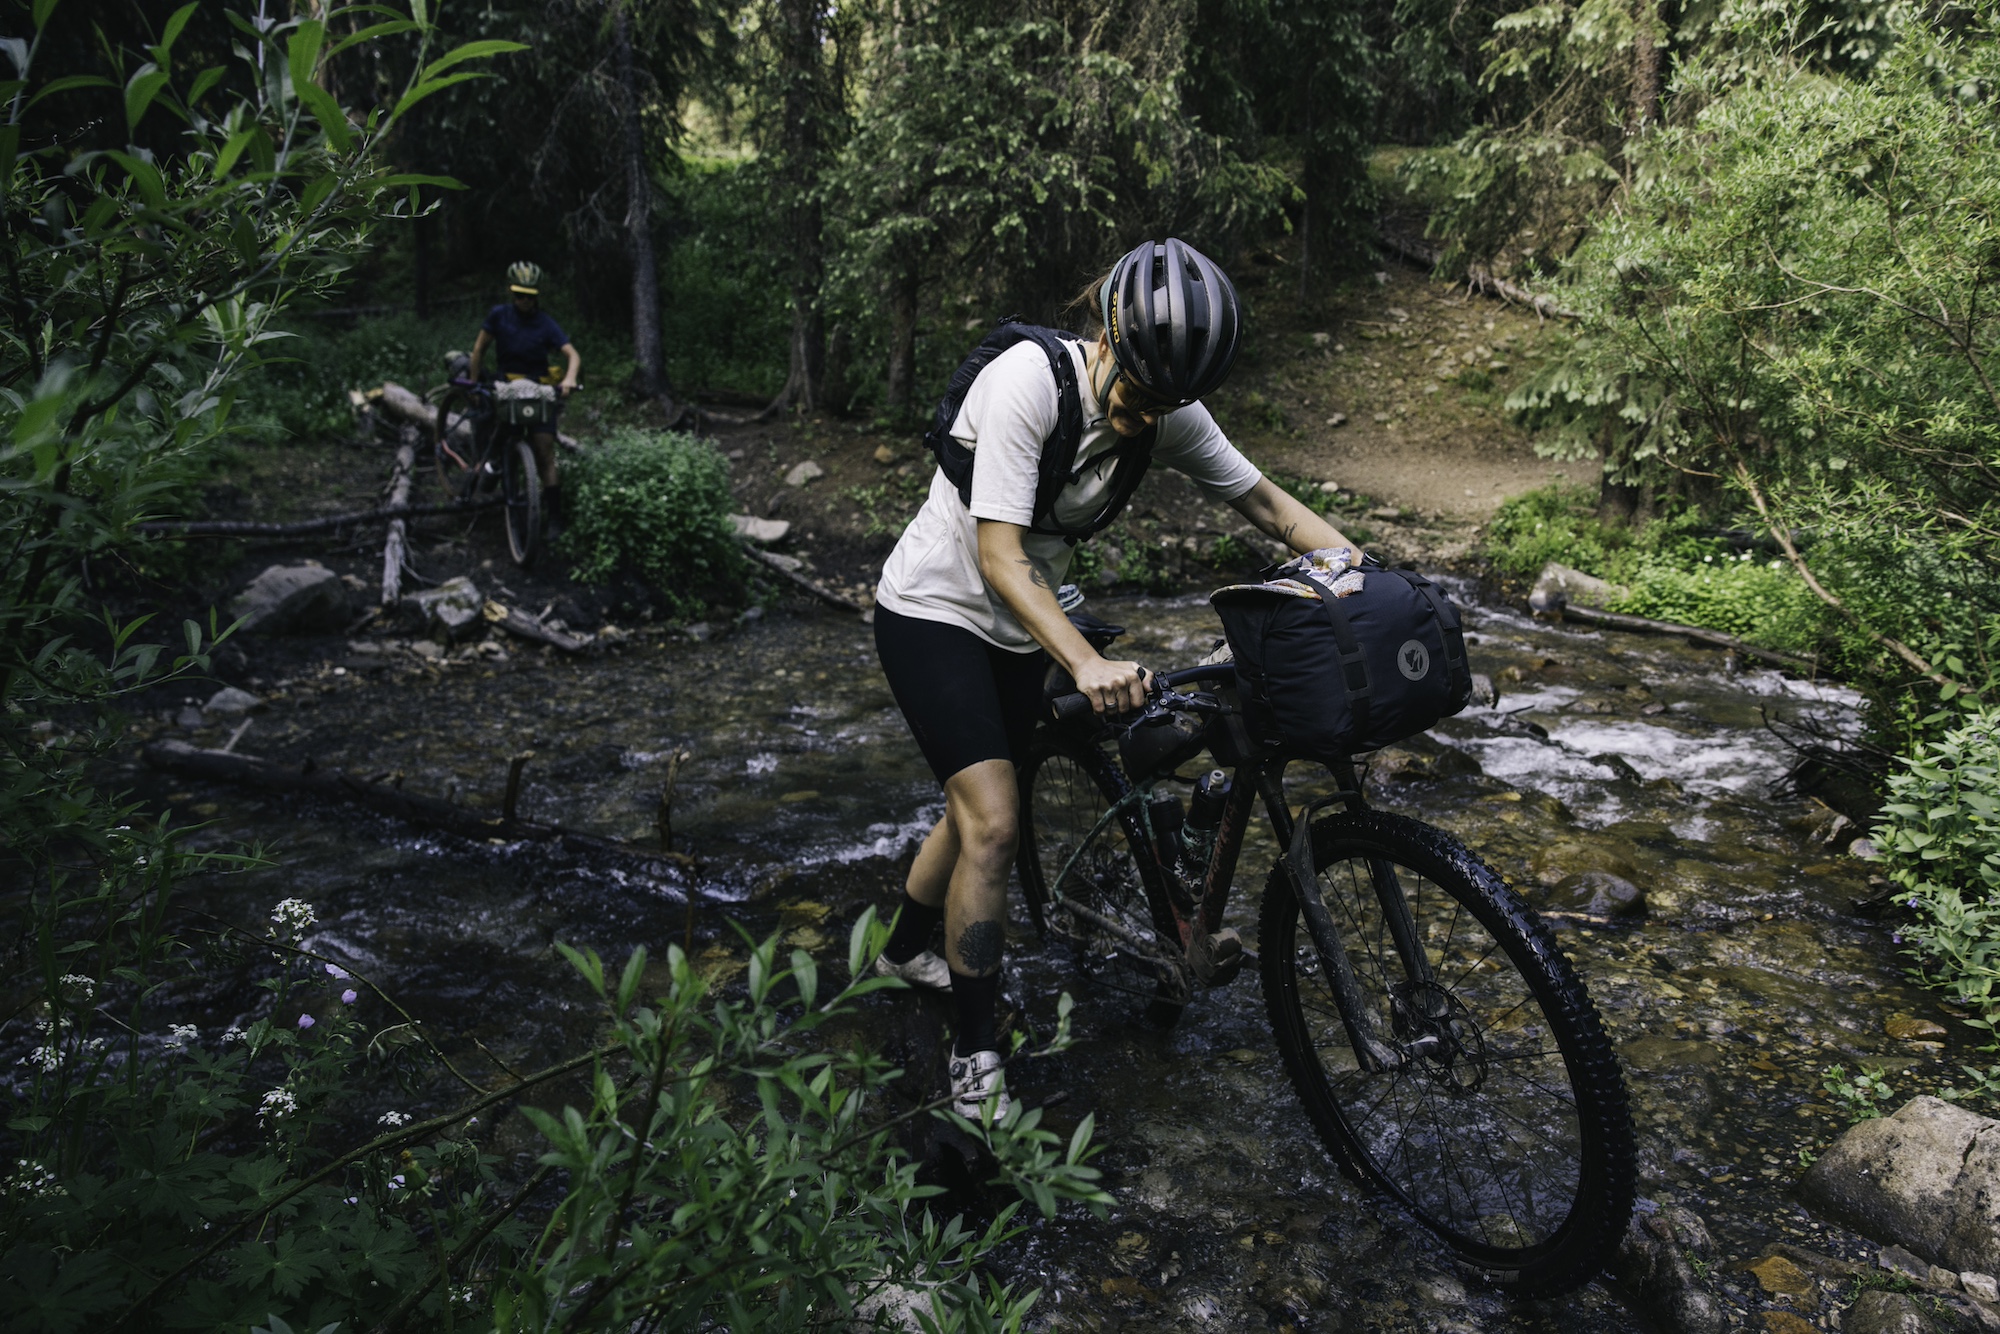
A couple of bib shorts, sports bras, four pairs of socks, a hat, a jacket and two of these tees was all I needed on this trip.
While minimal in its appearance, this cotton pocket tee was designed for biking. It features subtle touches that go almost unnoticed off the bike but are appreciated once pedaling. It's made of breathable organic cotton and features a loose fit with near-elbow length sleeves for extra coverage. There's also a zipper rear hip pocket to secure your keys or money and some subtle reflective elements to be seen at low-light.
The off-white tee I wore on this trip has never been clean again, but the black tee is still going strong. It makes for a great commuting, casual or mountain bike top as well.
Specialized/Fjällräven Sleep Poncho
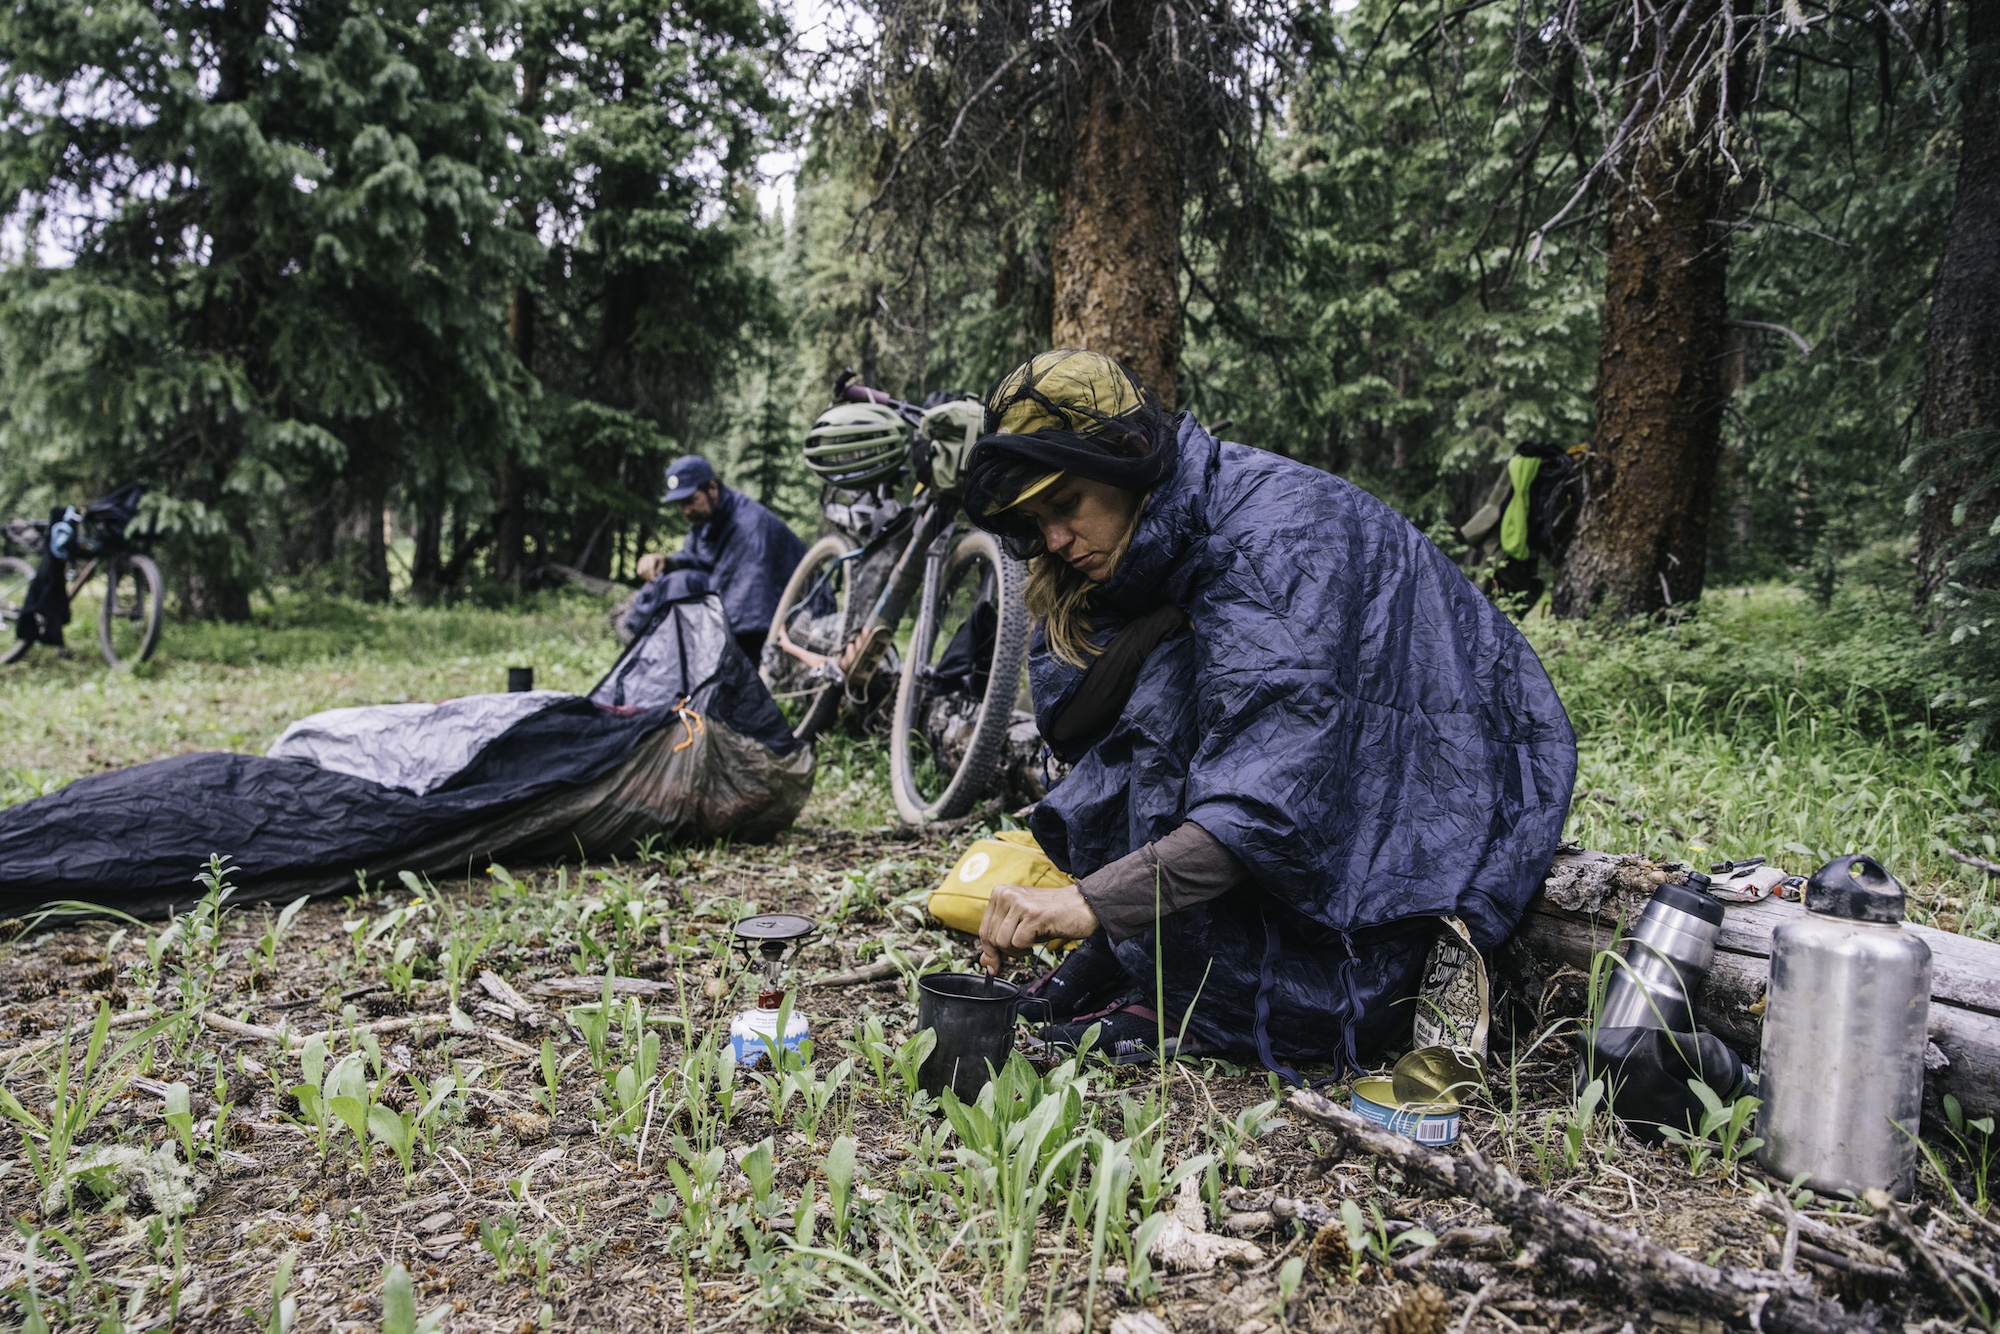
Sarah Swallow wears the Sleep Poncho at camp.
Whenever I'm getting ready for a trip, there's that moment where I lay out every item that needs to get stored in my bike bags, somehow. Clothing, cooking stove, sleep system, tent or bivy, toiletries, bike tools, etc -- it adds up quickly and I always find myself playing the "will I really need this?" game.
This Sleep Poncho enables you to carry one less item as it replaces both your sleeping bag/quilt and your puffy jacket. Rated down to 8 °C / 46°F, this insulated poncho features a tall collar, a large kangaroo pocket, a bungee cord at the hem and collar, side zippers to transform the poncho into its required shape and some bungee straps on the inside for a personalized fit, or to attach the quilt to a sleeping pad.
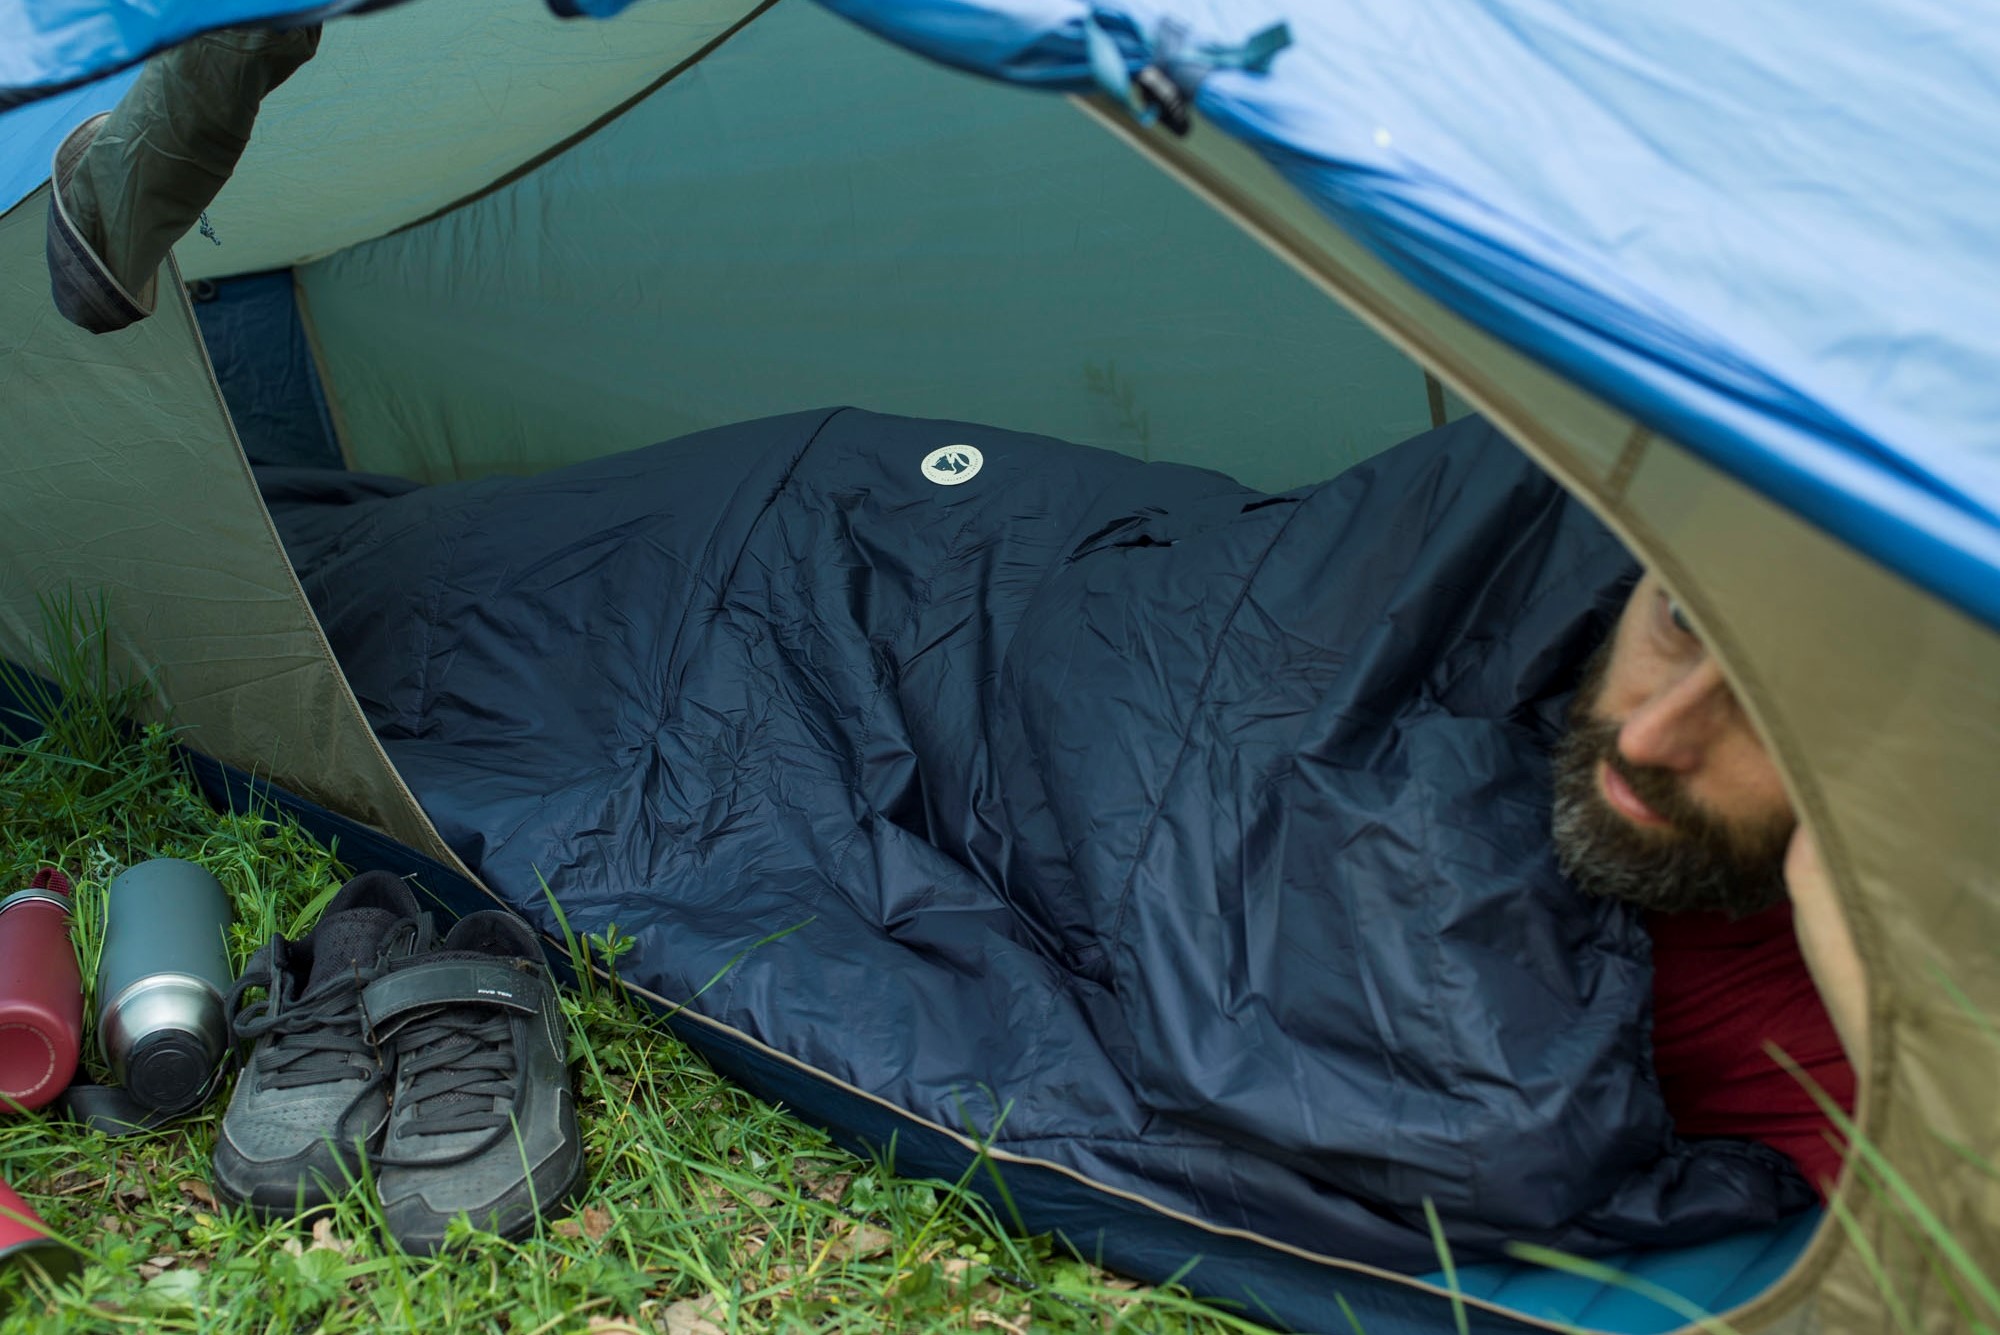
When we reached camp after pedaling all day, I'd wear the poncho as a changing skirt at first, then for comfort as we set up camp and made dinner. When it was time for bed, the poncho, together with a sleeping pad, turned into my sleep system. Fjällräven would be smart to post a how-to video because the design, while being rather ingenious, isn't all that intuitive. Basically, the poncho's collar tucks away with its own zip closure and the sides unzip to make one big rectangle quilt. You can use it as a blanket as is or transform it into a bag from here. The first step is to fold the quilt in half, hotdog style. Cinch the cord at the hem and close the snap. You have now created a cone shape. Tuck your sleeping pad into the cinched pocket you've created and close the bungee straps around the pad. You now close the zipper on the top and flip the whole thing over, pad on the ground. It got really warm and cozy during the nights on our trip, a tad too warm even. It's certainly warmer than a loose quilt and pad and takes up the same amount of space. And unlike a quilt, this poncho can take the place of your puffy jacket to stay warm around the camp before bed.
Note that S/F has noted the max user height as 185cm (6') for the regular length, 200cm (6'5') for the "long" version.

Cycling Weekly's North American Editor, Anne-Marije Rook is old school. She holds a degree in journalism and started out as a newspaper reporter — in print! She can even be seen bringing a pen and notepad to the press conference.
Originally from the Netherlands, she grew up a bike commuter and didn't find bike racing until her early twenties when living in Seattle, Washington. Strengthened by the many miles spent darting around Seattle's hilly streets on a steel single speed, Rook's progression in the sport was a quick one. As she competed at the elite level, her journalism career followed, and soon, she became a full-time cycling journalist. She's now been a journalist for two decades, including 12 years in cycling.