The tools you need for this are really simple. 4mm and 5mm Allen keys (or hex wrenches) are all that are required. You may wish to use a torque wrench if you want things to be more precise, but this is not essential. Below are our instructions on how to setup and adjust your caliper brakes.
1. Check the wheel is in properly
The first thing to do is to check you wheel is in square against the frame and is properly inserted into the drop outs. Once in securely, close the quick release.
>>> How to use your brakes properly (video)
2. Check the cable
If your cable is frayed, sticky, gummed up or worn, it will need replacing, as it won’t work properly and could fail.
>>> How to adjust your handlebar height
3. Undo the cable

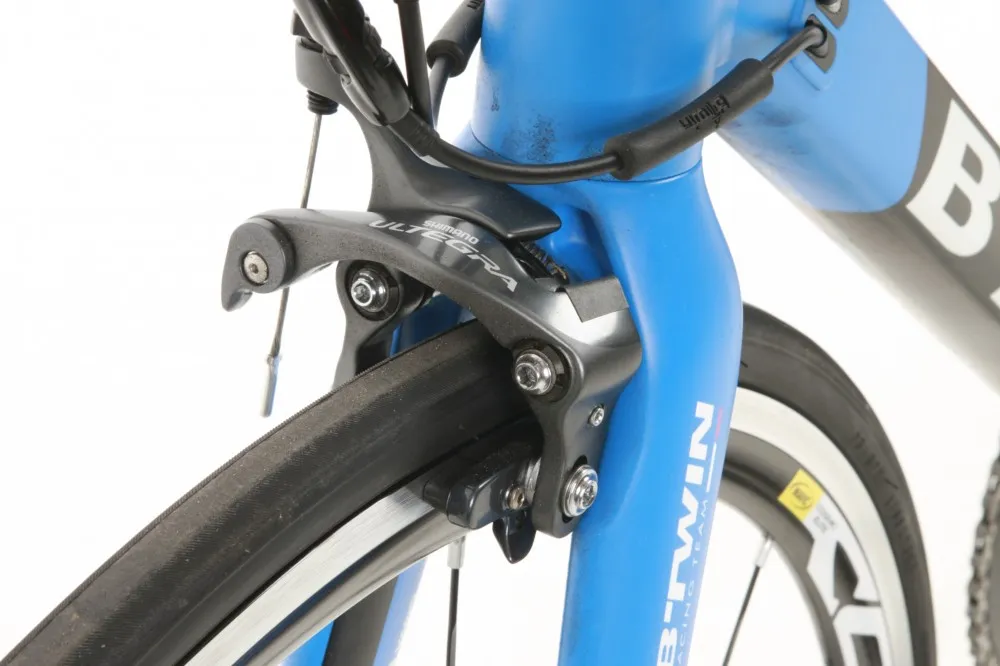
On Shimano calipers this will be a 5mm Allen bolt on the side of the caliper that clamps the cable. To adjust the brake, you don’t need to completely undo this bolt, but just loosen it sufficiently, so that the cable can move freely.
4. Centre the caliper

Now that you have released the tension of the cable you can loosen the retaining bolt. This is the bolt that attaches the caliper to the frame. It is usually a 5mm Allen bolt, located behind the fork, or between the seat stays. Pinch the caliper with your hand, so that the pads are grabbing the rim. At this point, tighten the retaining bolt to 8-10nm. This needs to be secure.
5. Set up the cable

To do this, locate the barrel adjuster at the top of the caliper. Wind it all the way in and then back it out a turn and a half. You next need to pinch the caliper closed so that the pads are touching the rim. Check that the cable is properly fed through the cable clamp, with no obvious slack. Tighten the cable clamp bolt to 6-8nm.
6. Adjust the position of the pads

The brake pads are adjustable in multiple ways. They can be adjusted up and down, rotated and toed (toeing is the angle of the pad against the rim). The height of the pad is important – too high and it could rub on your tyre and cause a puncture, too low and it will rub on the rim/decals, giving ineffective braking and loud noises.
>>> How to adjust your derailleurs (video)
We would suggest moving it down as low as you can. As the pad wears it will naturally move up the braking surface, meaning you wont have to adjust your brakes as often.
>>> Buyer's guide to road bike groupsets
If you wish to set up some toeing this can be useful for alleviating noise, such as that experienced on Mavic Exalith rims. Shimano actually recommends a toeing of 0.5mm. To do this, place something such as a business card in between the back of the pad and rim. This will mean the front of the pad will touch the rim first. Grab the brake lever to pinch the pads against the rim and tighten them with an Allen key to clamp the pads to 5-7nm.
7. Check the brake centering

You should already be in the right ballpark having undertaken step four. At the back of the caliper is 3mm Allen key bolt that allows you to adjust the distance between the pads and the rim. Getting the wheel dead centre will ensure even brake pad wear.
8. Fine-tune the cable tension

This is especially important if you have just installed a new cable, as it will require some bedding in. Grab the brake lever and pull it roughly 20 times, to check the cable is bedded in and there is no chance of anything slipping. You can then use the barrel adjuster to take up any slack.
Tightening the barrel adjuster will bring the pads in closer and loosening it will open the pads if they are too tight. The barrel adjuster is also designed to be tightened as your pads wear, further down the line. To make a more drastic adjustment, use the cam lever, also used for opening the caliper for wheel removal.