HOW TO IMPROVE YOUR AERO POSITION

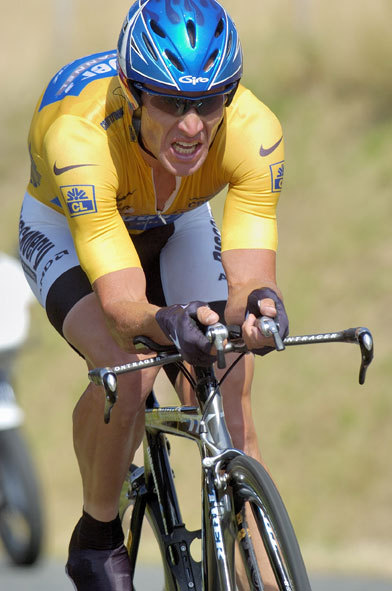
As is probably obvious by now, I?m obsessed with aero positions. So, it won?t surprise you that when I first saw Floyd Landis in his pointy, Mantis position a whole raft of questions blossomed in my brain. Was it really faster to ride that way? How much faster? Would it work for anyone? How did it handle? Would it work for me?
Armed with these fevered musings I went in search of answers. Of course, my search was rendered irrelevant when, halfway through this year?s Dauphiné Libéré, the Union Cycliste Internationale (bless the little Luddites) outlawed the Mantis position on the grounds that it allowed riders to support their forearms on their aerobars ? a dangerous and avant-garde practice that clearly had to be stopped.
But by that time I?d badgered aero position experts John Cobb, perhaps best known for being an aerodynamics adviser to Lance Armstrong, and Kraig Willett, engineering designer, bicycle aerodynamics expert and founder of biketechreview.com, into revealing a few of their closely guarded secrets for this step-by-step guide to improving your position.
STEP ONE
Starting out
The obvious starting point for changing to a new position is your old position (though, if you don?t have one, your position on the drops should be about right). ?Positioning your seat for maximum power transfer is the best place to start,? suggests Cobb. ?Then build your position around that.? Assuming you have that sorted already, leave your seat angle, seat height and crank length alone and concentrate on refining the rest.
STEP TWO
The latest race content, interviews, features, reviews and expert buying guides, direct to your inbox!
How low can you go?
It seems logical that the first thing to try is to make yourself lower on the bike. After all, bending forwards until your back and shoulders are in line with your hips ought to mean that there?s less of you to being hit head-on by the air. Unfortunately, while a lower position is a good beginning, it?s not as important as you might think.
?I?m living proof that lower is not necessarily better,? says Willett. ?For the better part of 15 years of bike racing, I made my bars as low as possible. Then I went to the wind tunnel in San Diego (www.lswt.com) and quantified how my axial force [the combination of wind resistance, drag, rolling resistance and many other forces that oppose your forward motion] changed as a function of reach, drop, elbow width, forearm angle, saddle position, etc. What I found out was that I had been riding below my potential, largely because I was trying to become as ?aerodynamic? as possible. Last year, I set lifetime personal bests over 20km with a bar position more than 10cm higher than previous positions.?
But we need to start somewhere, so we may as well start with getting lower. How low you can go without losing power or comfort will depend on how flexible you are, and also on where you are flexible. ?There are two basic shapes of riders,? explains Cobb. ?Group A, with good lower back flexibility right at the waist line, and [the more common] Group B who have back flexibility located in the upper back at shoulder blades.
Riders with the A style backs can get very low for longer distances. Group B riders will always have a big ?hump? in their back. When they try to go too low at the front several bad things happen. They sacrifice breathing ability [by bending forwards at the waist and compressing the diaphragm], they roll unwanted shoulder area into the wind, increasing drag, and their helmet won?t sit in a good position.?

STEP THREE
Narrow your focus
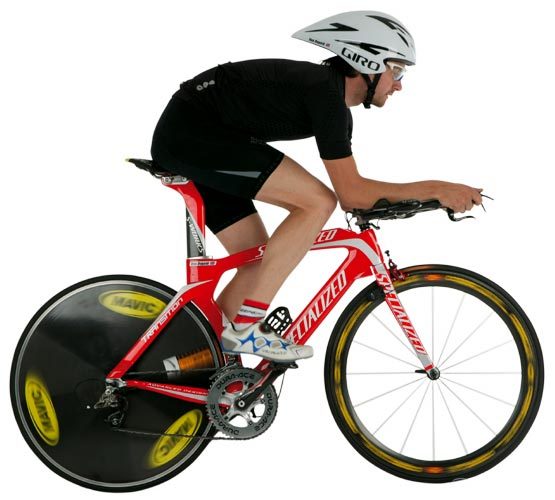
After you?ve established how low you can comfortably be, the next step is to look at making yourself streamlined, because an aero position isn?t just about having less air hit you, it?s also about finding ways to get the air to flow smoothly over and past you as you ride. ?As a general rule, having the hands as narrow as possible is always best,? explains Cobb. ?Having the elbows no wider than the hips or upper legs is good, although shoulder width will ultimately dictate how narrow the elbows can be. Knees that are thrashing around in the wind are always bad, so while it?s not critical that the knees brush the top tube, they should be within a centimetre or so.?
Once again, however, the fact that everyone is shaped differently complicates the picture. ?A rider that has large, square shoulders may need more open elbows,? explains Cobb. ?But that same combination with a curved, Group B, back will need narrow elbows. There are just a lot of combinations, and they all require small trade-offs to give the overall best position.
The Landis and Leipheimer, ?raised hands? positions have to be tied to proper elbow-pad placement to build the increased leverage for making better power. This is a position that it is very critical to work out in a very controlled test environment, 95 per cent of all riders that just raise their hands higher will be measurably slower in a wind tunnel, directing the airflow over and around the shoulders really is critical.?
For these reasons, Willett suggests testing both narrower and wider arm and elbow positions, comparing the arms more stretched out to less, raised up (like Landis and Leipheimer) or sloped down (in the manner of Jan Ullrich himself), pointing out that: ?I don?t think it?s possible to say for sure what is best without testing. I?ve seen the Superman ?work?, I?ve seen the Leipheimer position ?work?.?
Given the nature of a roll-down test (which is not precise enough to detect tiny changes in aerodynamics) it?s probably best to make bigger changes first, and then work back from them, rather than the other way around. However, it?s unlikely you?ll get it exactly right first time, but keep working away and you?ll eventually find something that works best for you. Above all, Willett urges: ?Don?t be afraid to experiment! Fiddle, tinker, tweak ? enjoy the process!?
STEP FOUR
Change your shape
Obviously, nothing short of drastic surgery can change a squat, broad-backed troll into a razor-like aerodynamic whippet. However, I have discovered that you can teach yourself some helpful little habits. With a little practice and focus these can help you stay aero, even as you tire during a race.
Rotating my hips forward on the saddle helps keep my upper body still and level. Using long, straight aero-bar extensions encourages me to reach forward and pull my shoulders in and up towards my ears, effectively making them (and my position) narrower. I?ll even try tucking my head down and in like a tortoise to keep my aero helmet flat against my back, even though it somehow makes me stick my tongue out.
But, as I said earlier, I?ll try just about anything!

HOW TO TRAIN YOURSELF AERO
1. First and most obviously: ride your TT bike more often. Try doing one hard ride and one easy ride each week alone on your TT bike, as well as one or two long rides each month. Stick to flat to rolling routes, so that you can stay aero for the majority of the ride.
2. Improve the flexibility of your hamstrings, lower back and shoulders to make holding an aero tuck a lot less uncomfortable.
3. First outlined by Chris Boardman in the November 2004 edition of British Cycling?s Coaching Insight, this training session will increase your efficiency in a new TT position.
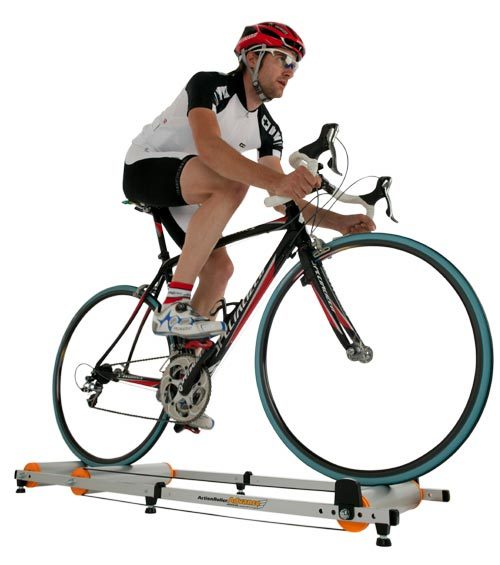
* On your turbo or rollers, warm-up with 10-20 minutes at 90-100rpm, building up from easy to brisk.
* Drop your speed and select a gear that has you pedalling at 50-60rpm (Boardman?s own gear was 53x14) and get aero.
* Do 20 x 6 seconds as hard as possible followed by 24 seconds recovering in the little ring. Stay aero, and keep your body as still as possible during each effort.
* Do 5-10 minutes at 90-100rpm, building gradually from easy to brisk.
* Do another 20 x 6 seconds with 24-second recoveries.
Founded in 1891, Cycling Weekly and its team of expert journalists brings cyclists in-depth reviews, extensive coverage of both professional and domestic racing, as well as fitness advice and 'brew a cuppa and put your feet up' features. Cycling Weekly serves its audience across a range of platforms, from good old-fashioned print to online journalism, and video.