
Trying to get faster is a goal for both the professional and amateur cyclist alike. WorldTour teams leave few stones unturned in the pursuit of speed, spending huge sums of money on a series of small details with the hope that it all adds up to victory.
You too can adopt the same marginal gains approach but without breaking the bank. That’s right. While it might be tempting to throw money at the problem to get more aero, there are plenty of things you can do to your setup to go faster that won't cost you a penny.
From riding position to minor mechanical adjustments, here are eight easy ways to gain free speed.

1. Get more ‘aero’ by adjusting your position
If you’ve already begun your journey to get faster then it’s likely you’ll have considered aerodynamics. It’s the most significant speed upgrade that you can make and one that doesn’t have to cost the earth.
Of course, you can buy a more aerodynamic bike frame and aero racing wheels, but those upgrades will cost you thousands of pounds. And, regardless, a large proportion of the aerodynamic drag slowing you down will be caused by your own body.
By adjusting your position on the bike you can not only make yourself more aerodynamic but may also increase pedalling efficiency.
Adjust your saddle position and overall bike fit, with the goal of being as aerodynamic as possible. This will vary from person to person but as a general rule you’ll want to aim for a position that improves your aerodynamics without being so aggressive that you negatively impact your power output. For most people, that means hinging at the hips, having a back that is nearly parallel to the floor, and holding your handlebars with your elbows bent at 90-degree angles. It should look something like this:

A tucked position with elbows bent will make you a lot more aero
Adjusting your saddle height is quick and easy, with an Allen key the only tool required.
There are various schools of thought on achieving the optimum height. Some of them require a master's degree in advanced mathematics to figure out but a simple rule is your inseam measurement minus 10cm. For example, if your inseam is 85cm, try setting your saddle height at 75cm (from bottom bracket centre to the top of the saddle).
It used to be thought that getting as low as possible at the front end was most aerodynamic. Modern testing, however, has found otherwise, and many professional riders now tend to have positions that are longer and narrower — more stretched out rather than simply lower. Without forking out for new handlebars or a longer stem, you can still make small changes. At UCI level, the brake levers can be inwardly rotated up to 10 degrees, essentially providing a narrower position.
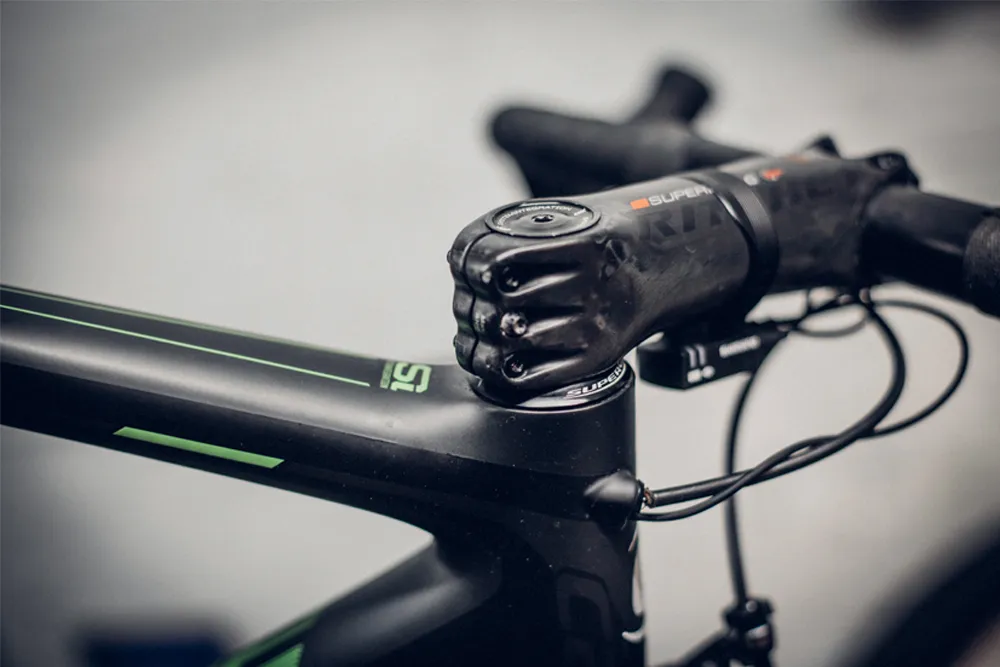
Tweaks to your stem length and angle, and handlebar height, can improve aerodynamics
Typically a road bike will be sold with a steerer length that allows for a few spacers, often around 2.5cm in total and usually sitting under the stem, so there's plenty of room for adjustment. If you do feel too upright, remove spacers from underneath the stem and place on top. You can also go as far as to flip the stem so it’s flatter.
Removing the spacers is referred to as ‘slamming the stem’ in cycling parlance, and although positions are changing, it's still a popular thing to do among racers and can put you in a more aerodynamic position. It requires a degree of flexibility and isn't for everyone.
Achieving a slammed stem is a quick and easy adjustment that can be done by almost any at-home bike mechanic. The more spacers you remove, the more extreme the position change will be, which means it will take you a longer time to get used to it. Best practice is to lower the front end in increments, thus allowing your body time to adjust and simultaneously become more aerodynamic and flexible.
If you find that you're experiencing any neck, wrist or back pain, or you're struggling to produce the same power in this lower position, back off, raise the stem and work on your strength and flexibility.
2. Improve your flexibility and core strength

Watch a little racing on TV and you’ll quickly notice that the riders are able to maintain a flatter position on the bike.
For us mere mortals, obtaining the desired ‘flat back’ isn’t always so easy, and staying in it mile after mile is often even more elusive. But if you’re struggling to achieve, and hold, a more aerodynamic position don’t panic. There’s plenty of work that you can do off the bike to improve your comfort on it.
Improving flexibility is the first port of call. Focusing on stretching your hamstrings, glutes and lower back should pay dividends - but remember, Rome wasn’t built in a day.
Adding some additional focused off-the-bike sessions such as yoga and pilates can help improve your flexibility too.
As we mentioned earlier, getting into a more extreme position on the bike is one thing but being able to hold it, while still putting down the power, is another again. Improving your core strength will aid this significantly. Not only will it help you stay comfortable, but will also improve your pedalling efficiency and likely help you stay injury free.
If you're not sure how to stretch these areas or improve your core strength, then these four exercises can help build the perfect core routine.
3. Clean your bike
It won’t come as a surprise that a clean bike is faster than a dirty one. What might, however, is just how much the collected grit and grime is costing you in the shape of wasted watts.
Whether a wipe down, a quick rinse, or a full-on power wash (steering clear of the bearings), it all helps.
Studies have shown that a “dirty" chain can cost you 10-20w, which translates to 1-2kph at race speed. But more on that in a minute.

Keep it clean for faster riding
First consider the benefits of a clean bike to your mental approach. There is nothing like the feeling of swinging your leg over a sparkling clean bike, donning a new pair of shoes and fresh kit.
Focus on the drivetrain and components, and especially the ones that spin. When it comes to speed and pedalling efficiency, a clean, well-lubricated chain is one of the most important factors.

The chain is where you transfer the power from the pedals to the wheel, and the place that you can lose the most power.
To get rid of those lost watts, you’ll want to clean and lube your chain regularly, armed with one of the best chain lubes for bikes. How often you do it remains up for debate, and it’s likely to vary depending on the season, but at least every couple of rides is advisable.
The process is straightforward but remember you’re applying the lube to the chain’s rollers (inside) rather than the plates (outside). Once you’ve applied the lube don’t forget to wipe off any excess with a cloth — left on this just attracts dirt and is quickly the undoing of your good work.
You can also opt for wax over lube. Many chain waxes on the market will talk up their watt-saving properties but they are more time-consuming to prep and apply than a humble lube.
It’s worth pointing out here that you’ll also need to consider the state of your drivechain. If the chain, cassette, chainrings and jockey wheels are covered in gunk then you’ll want to de-grease and clean these first before you lube the chain.
4. Adjust your tyre pressure
In the last few years tyre widths, and subsequently tyre pressures, have changed. The narrow 23mm racing tyre, typically inflated to 120psi, is largely a thing of the past, replaced by wider tyres, run at lower pressures.
Today, cyclists race on tyres ranging in width from 25 to 28mm, or perhaps even wider for a race such as Paris-Roubaix. Tyre pressures are likely to be around 80-90psi, but lower still if they’re riding tubeless; Alejandro Valverde’s 28mm tyres at the 2022 Strade Bianche race measured just 53.7psi on the front and 55psi on the rear, for example.
Ultimately the ideal tyre pressure for you depends on what kind of tyre you’re running, the weather conditions and your weight.

Get your tyre pressure set up right for a fast - and comfortable - ride
Tubeless tyres are becoming more common, while tubulars are still a popular racing tyre. Clinchers are still the norm for training, but mostly because they are the cheapest and easiest to mount and repair. So how do you find the perfect tyre pressure?
It’s highly weight dependent, but for a 70kg rider, you can start around 80psi as a general benchmark. With a narrower 23mm tyre, you can try 90-100psi, whereas a wider 28mm tyre should work well around 60-70psi. There are a number of other factors to take into consideration, but thankfully we’ve compiled them all in our post on what’s the correct road bike tyre pressure?
Lighter riders should go lower, while heavier riders should use higher tyre pressures. Also, make sure to reduce tyre pressure in wet conditions, as this increases the tyre’s contact patch with the floor, giving you better grip in the corners and decreasing your risk of crashing.

Zipp wheels are now designed for wide tyres at lower pressures
Also check out the tyre pressure recommendations from your wheel manufacturer - Zipp for example recommends significantly lower pressures for its rims with hookless beads.
The end result of the best tyre pressure is speed, on the flats, up the climbs, and ripping around corners.
5. Check your rear derailleur
There are few things more frustrating to a cyclist than skipping gears, and few moments more sketchy than skipping a gear in a sprint. Adjusting your rear derailleur will not only save your sanity, but it can also make you faster.
Each part of your drivetrain (crank, chain, sprockets, etc.) has a maximum efficiency where you are effectively losing close to zero watts between the pedals and the wheel. But with every bit of dirt on the chain, or wear in your cogs, or skip in your derailleur, you are losing precious watts and speed.
Thankfully, minor rear derailleur adjustments, which are all you’ll need 99% of the time, are easy to do and quick to solve. You don’t even need tools or a bike shop in most situations. Assuming your rear derailleur was originally set up and aligned correctly, all you need is a turn or two of the barrel adjuster. If the gears are slow to shift up to a larger sprocket you’ll need to add some tension to the cable but if its hesitant coming back down the block you’ll want to remove a little.
The same principle applies for electronic shifting in that you’ll want to make small adjustments to the derailleur so it shifts cleanly but here you’ll need to follow the manufacturers guidelines to dial it in.
6. Check your brakes
How many times have you been dropped on a climb and you look down to see if your brakes are rubbing? We’ve all been there, and it's normally caused by less than ideal legs.
But every once in a while, those brakes are rubbing, and that completely kills your speed.

Make sure your brakes are properly adjusted to avoid rubbing
It is usually fairly obvious enough when your caliper brakes are rubbing, as you can see them in contact with the rim. Disc brakes are harder to spot by eye, due to their position on the bike. In fact, you will probably hear disc brakes rubbing before you see them rubbing. The faint metal grinding is quite distinguishable, and every bit of rubbing is shaving off speed.
There are many different ways to adjust disc brakes, including the literal hands-on approach of bending the rotor if it’s out of true in one spot, or more fine-tuned adjustments that have to do with the hoses and brake tension.
Before you make any adjustments to either the rotor, or to cable tension if you’re using mechanical disc brakes, make sure that the caliper is properly aligned. From this starting point you can confidently diagnose the cause of the rubbing.
Often you can achieve this ‘centring’, especially with hydraulic versions, by simply loosening off the caliper mounting bolts just enough so the unit can move a little, pressing the lever so the pads meet the rotor, then holding the lever down while you re-tighten the bolts. This should alleviate any rubbing caused by a misaligned caliper by centring it around the rotor.
7. Remove excess weight
Hill-climbing specialists will typically go to some pretty extreme lengths to shave a few extra grams from their bikes. In some instances, that means literally shaving off parts of your bike such as the bar ends. But in other cases, it can be as simple as removing a bottle cage or front derailleur.

Chop the ends off your bars to save some weight
If you are racing an uphill TT or going for a steep Strava KOM/QOM, you will have a better chance of success with a little less weight on board. As long as you don’t need the extra bottle cage or derailleur, it is just unnecessary weight.
For those of you wanting to go to the extremes — perhaps you want to attempt a long and prestigious Strava KOM/QOM, or try your hand at Everesting — there are many other areas where you can save or remove weight. One brake (but not both), bar tape, gears, and drop bars can all be partially or completely removed in the name of saving weight.
Smaller changes also help. Before a ride, consider what you really need. Do you need two inner tubes in your saddle bag? Or your entire wallet in your back pocket? All the extra grams add up!
8. Consider your kit
Flapping clothing will definitely slow you down. There's no benefit to having a parachute flying behind you in the form of a loose jacket or gilet, and well-fitting garments allow the air to flow more smoothly over the body.

Wearing close fitting cycling clothing will reduce drag
Lycra is worn by cyclists for a number of reasons: comfort, protection and enhanced performance. Loose clothes create more drag, so make sure your kit is as snug as possible without being restrictive. Most cycling garments have an element of stretch so as not to impede pedalling or breathing even when worn close to the body.
You don't have to wear a skinsuit to gain some drag-reducing benefits — just something that's not too baggy — but if you're racing, it may be something worth considering.